Step 1:
Basically in this tutorial you will be converting a regular skateboarding image into a great looking poster advertisement that people outside of the internet life like! The picture above is a result in what we will be making from the picture below.
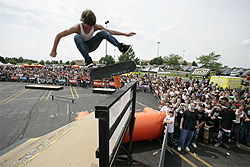
Start off by grabbing a random image of the internet as long as it’s not copyright or unless you have permission. If you can’t find a good looking image, please just take the one above so you can atleast learn how to make this first.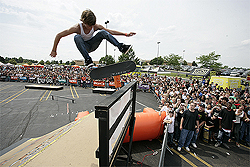
Step 3:Now since you have the image, you’ll want the quallity to be a little higher than expected. Go ahead and read my High Definition tutorial to do this. Basically all you have to do is sharpen it.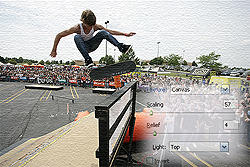
Now it’s time to add some texture to the image. Lets select the background layer (image) and go to Filter > Texture > Texturizer. Now the image look something like the one above.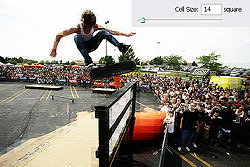
After you have added some texture to the image, it’s time to actually spice it up a bit! Grab the layer you just added the effect to and duplicate it. Now go to Filter > Pixelate > Mosaic and change the cell size to 14.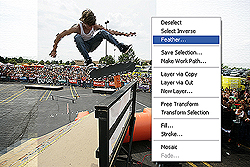
Go back to step 2 and grab the original image and paste it in there again. Now gently using the Magnetic Lasso tool select around the skater. Right click and hit Feather > 3 pixels. Now hit CTRL+C to copy it then CTRL+V to paste it.
Make sure you are on the cutout layer that you just copied / pasted and hit CTRL+U now. A Hue & Saturation window will pop up. Move the bottom one all the way to the right to turn it to white. Hit OK then go to Filter > Stylize > Wind. Change it to wind and from the right. Now set that layer to Overlay. Above it isnt set yet so it looks different. Now move it around the skater to the left and down a little bit to make it look like he’s in motion.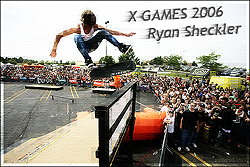
Now add some of your own effects like a border and some custom text and your all finished! You can download the full complete PSD with the text & border by clicking the link below! Please experiment with this.Click here to download the PSD from avivadirectory.com/photoshop.
Basically in this tutorial you will be converting a regular skateboarding image into a great looking poster advertisement that people outside of the internet life like! The picture above is a result in what we will be making from the picture below.

Start off by grabbing a random image of the internet as long as it’s not copyright or unless you have permission. If you can’t find a good looking image, please just take the one above so you can atleast learn how to make this first.

Step 3:Now since you have the image, you’ll want the quallity to be a little higher than expected. Go ahead and read my High Definition tutorial to do this. Basically all you have to do is sharpen it.

Now it’s time to add some texture to the image. Lets select the background layer (image) and go to Filter > Texture > Texturizer. Now the image look something like the one above.

After you have added some texture to the image, it’s time to actually spice it up a bit! Grab the layer you just added the effect to and duplicate it. Now go to Filter > Pixelate > Mosaic and change the cell size to 14.

Go back to step 2 and grab the original image and paste it in there again. Now gently using the Magnetic Lasso tool select around the skater. Right click and hit Feather > 3 pixels. Now hit CTRL+C to copy it then CTRL+V to paste it.

Make sure you are on the cutout layer that you just copied / pasted and hit CTRL+U now. A Hue & Saturation window will pop up. Move the bottom one all the way to the right to turn it to white. Hit OK then go to Filter > Stylize > Wind. Change it to wind and from the right. Now set that layer to Overlay. Above it isnt set yet so it looks different. Now move it around the skater to the left and down a little bit to make it look like he’s in motion.

Now add some of your own effects like a border and some custom text and your all finished! You can download the full complete PSD with the text & border by clicking the link below! Please experiment with this.Click here to download the PSD from avivadirectory.com/photoshop.
Thank you for visit our blog.
Hope you can learn something new from this tutorial. You can share your thought & suggestion with us though comments below.
Hope you can learn something new from this tutorial. You can share your thought & suggestion with us though comments below.
Discover the top most quality clipping path, clipping path service or low cost clipping path, image masking service & photo editing in reasonable price with quick turnaround time from Clipping Design, one of the most popular outsourcing clipping path service provider.
Clipping Design always ready to provide 100% handmade clipping path, photoshop clipping path, clipping path service, SEO service & photoshop masking with Guaranteed client satisfaction on top quality clipping path service & masking service .
Clipping Design always ready to provide 100% handmade clipping path, photoshop clipping path, clipping path service, SEO service & photoshop masking with Guaranteed client satisfaction on top quality clipping path service & masking service .
Thank you…
Reference: avivadirectory
No comments:
Post a Comment