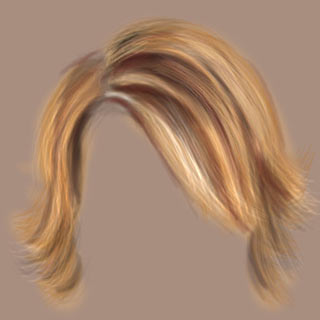
Step 1 - Choose a fairly neutral base color to start with.

Step 2 - Decide what color you want the hair to be and start to block in the general shape of your hairstyle.

Step 3 - With a darker color, begin to accentuate the shadows. Usually hair lays down in clumps and layers so try not to focus on individual hairs and lines, get the shape down first:

Step 4 - Here I've started to smooth out my coloring a bit... you'll also note that I am a veeeery messy painter. This doesn't work well for everybody, but it works ok for me. I like to start sloppy and tighten things up as the image progresses. :)

Step 5 - I use a custom brush consisting of several small dots to sweep in "strands" of hair. This way works quickest and easiest for me. We're still bumping up those highlights and shadows.
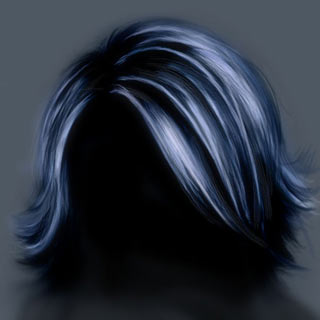
Step 6 - I applied a shadow "under" the hair since there is no face... that way its not floating ;) Remember that your hair will more than likely cast shadows across the face of your figure, if you forget that part you will often lose depth in the image. Again I've smoothed out some of my painting:

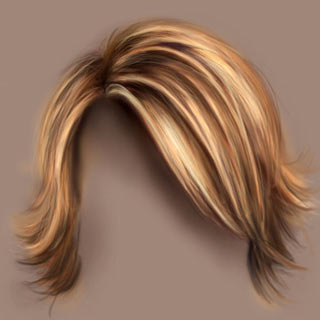
Step 7 - I've brought out more individual clumps of hair and started to add a little more fine detail at this point:

Step 8 - With a finer brush I'm still sweeping in some of the smaller hairs... try not to get too hung up on that though. Lots of stringy hairs don't look very good. ;D

Step 9 - This is the last step in the tutorial. If I were actually painting I would take this further, and so should you. :) I've deepened the shadows in several areas to accentuate the way the layers fall. I also brushed in some brighter strands of hair and cleaned up the "part".
Step 10 - Just some color adjustments for fun, blue hair. Blue is gooooood. :D
Hope you enjoy it & learn something new from this tutorial.
Determine best quality clipping path, clipping path service, low cost clipping path or photo editing & image masking service from Clipping Design. Clipping Design always assure photoshop masking , image editing service at quick turnaround time with Guaranteed client satisfaction on top quality SEO service. You can also discover 100% handmade clipping path & clipping path service in reasonable price.
Thank you…
Reference: gas13.ru
No comments:
Post a Comment