
Today will will show how to make a realistic looking plate from scratch in Photoshop. We use only Photoshop basic tools of Photoshop. We will make simple circle, and transform it into a hyper realistic plate. So let's have a look.....
Step 1
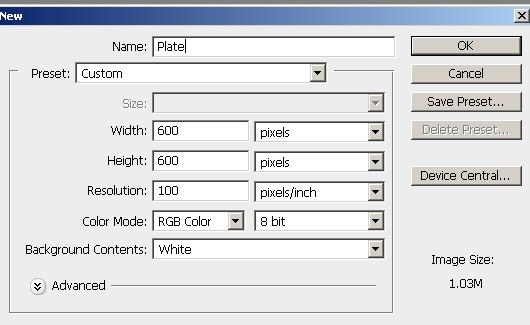
Create new photoshop document of 600 x 600 pixel filled with white background and name it Plate.
Step 2
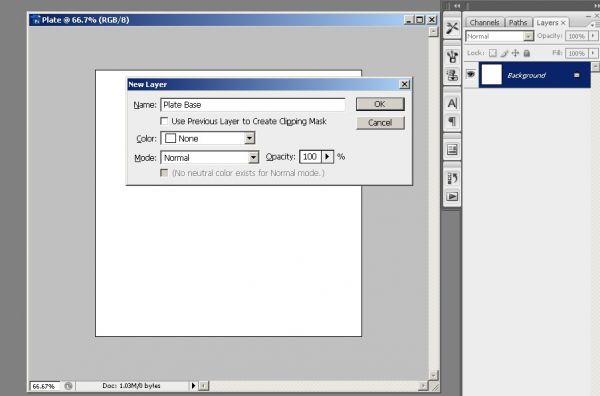
Press shortcut Ctrl+Shift+N for creating new layer and type layer name "Base Plate"
Step 3
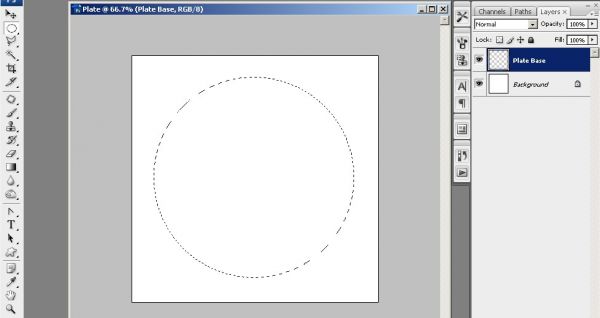
Press M to select "Elliptical Marquee Tool" and take mouse pointer to the center of document, now press and hold alt+shift and drag mouse to create perfect circle.
Step 4
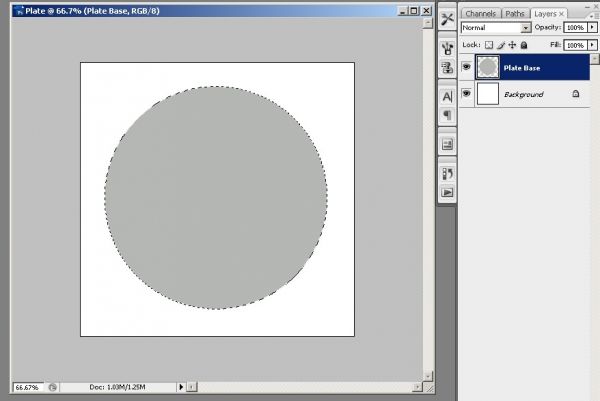
Fill Circle with color code B5B7B4.
Step 5
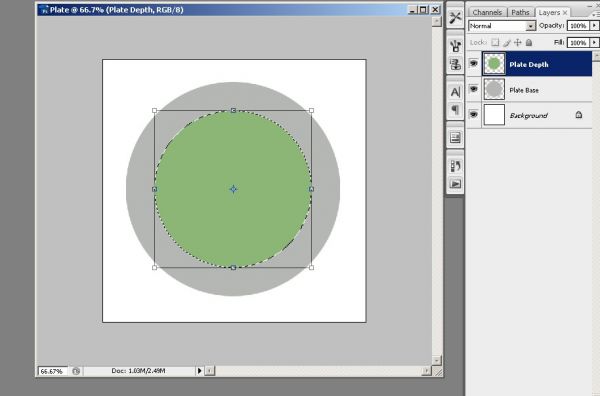
Duplicate "Plate Base" layer by right clicking on it and choosing command duplicate. Rename this new layer to "Plate Depth". Now both layers are identical, we will fill newly created layer with some other color.Ctrl+Click on "Plate Depth" layer and fill selection with green color. Press ctrl+T for free transform, press and hold alt+shift to reduce it size accurately
Step 6
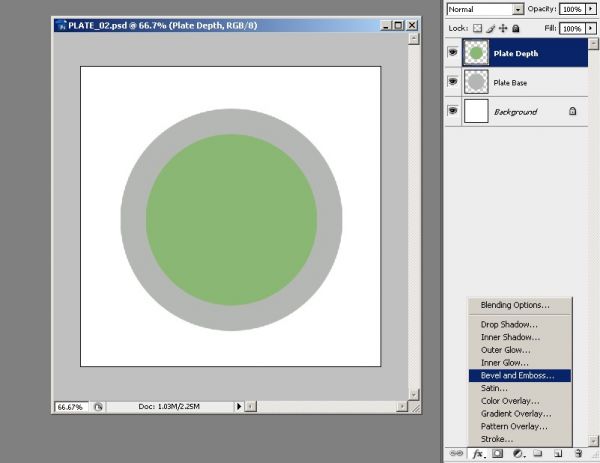
Click on fx button and from pop-up menu, choose command "Bevel and Emboss". Make sure that "Plate Depth" is selected.
Step 7
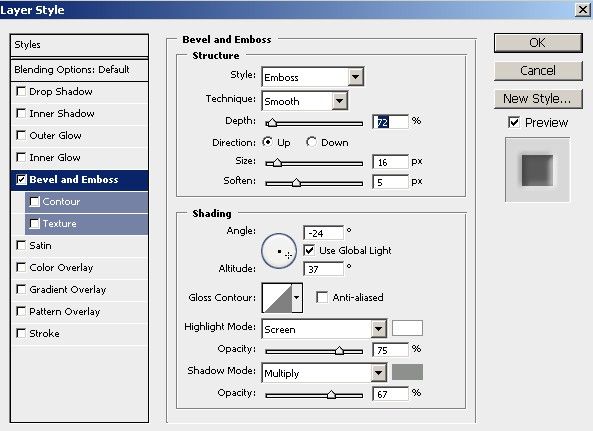
Apply Emboss setting as shown below in picture, set shadow mode color to code 8E908D. Default is black which will dark for this tutorial.
Step 8
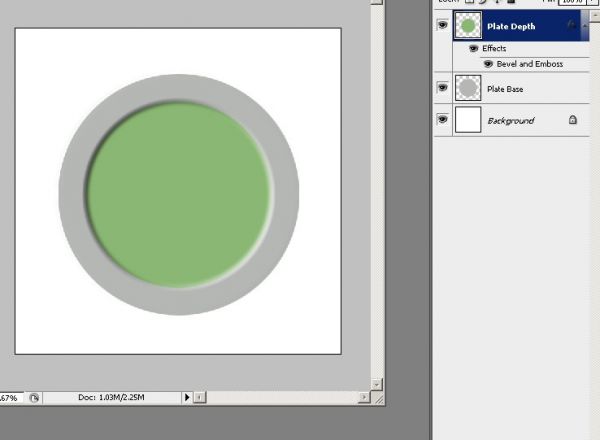
Result after applying emboss effect.
Step 9
Double click on effects of "Plate Depth" layer and set parameter of gradient overlay as shown below.
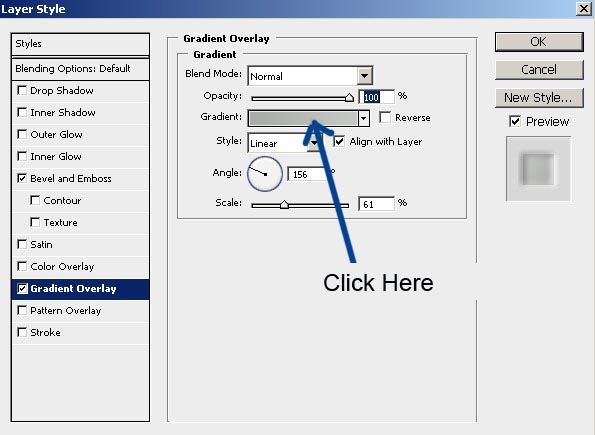
Step 10
In this step we will define two color for our gradient overlay, double click on small button to set their colors.
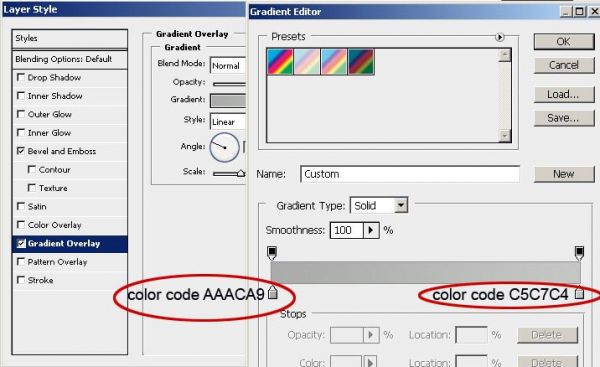
Step 11
The Basic plate is completed so far.
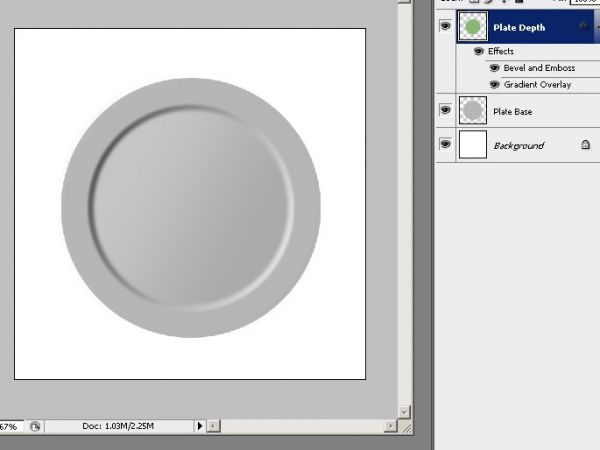
Step 12
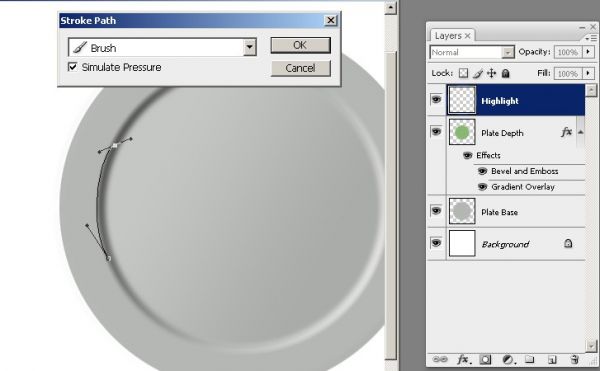
Create new layer and name it highlight. Take hard brush, set its size to 2 px, set foreground to white. Select pen tool and draw path for highlight.
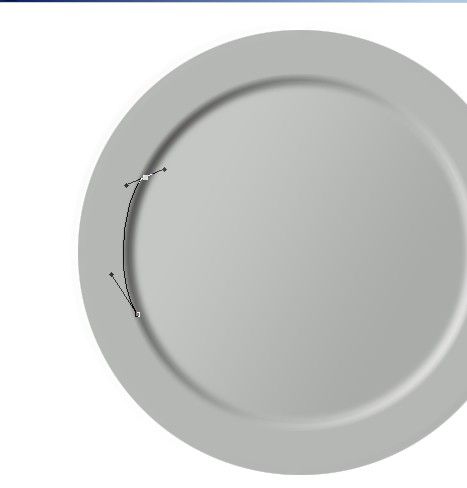
Step 13
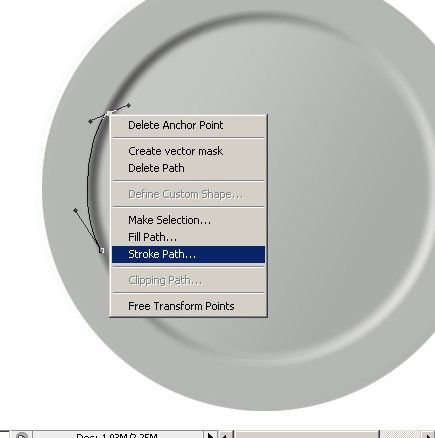
The path has been successfully drawn, we need to stroke it simulating pressure. "Convert Point Tool" is still selected, right click on path and choose command "Stroke path".
If you are not familiar and comfortable with pen tool then it is highly recommend to take some time and get control on pen tool. Another way for creating highlights is to draw them by brush tool. Although creating these type of highlights with pen tool is very fast and accurate.
Step 14
Make sure to check mark "simulate pressure".
Step 15
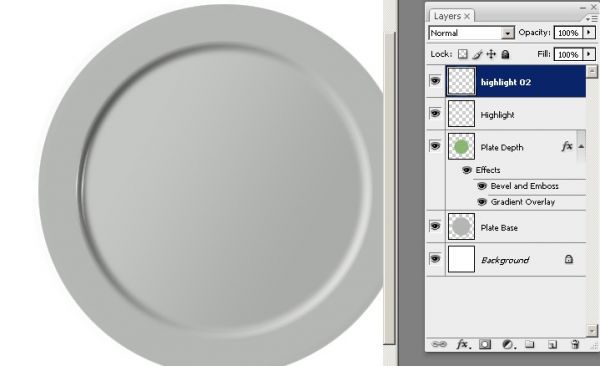
Duplicate highlight layer, rename it "highlight 02" and place as shown in image.
Step 16
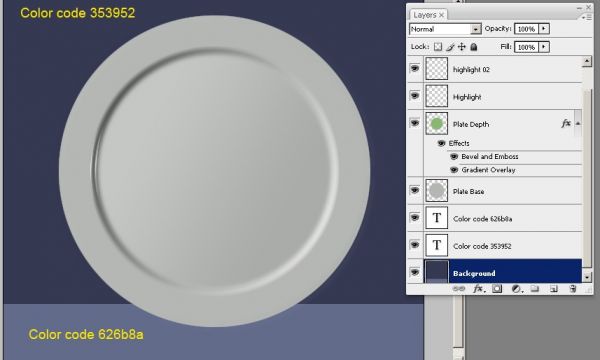
Double click on background layer to make it normal layer. Fill backgroud color with color code "353952"and "626B8A" , with the help of rectangular marquee tool.
Step 17
Create new layer above highlight02 layer, name it "Edge highlight" and draw another path for plate edge highlight.
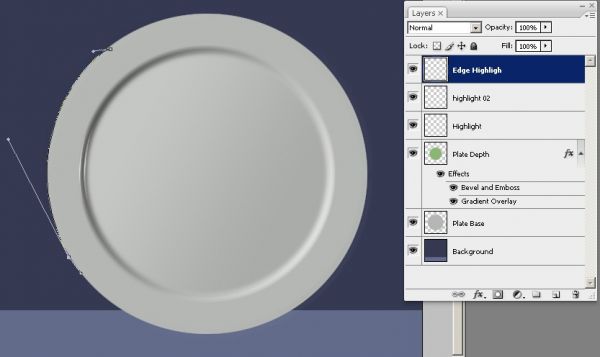
Step 18
Stroke path with white color using simulate pressure option as we did before. Size of Hard brush is 2 px.
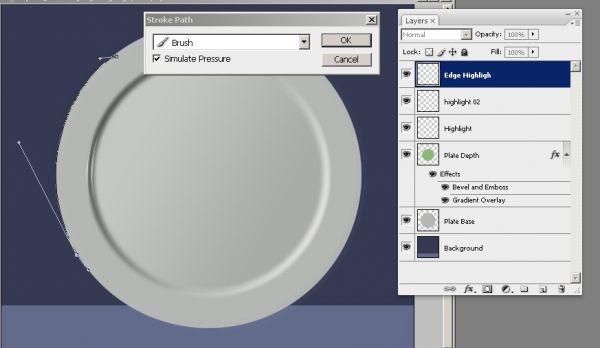
Step 19
Create last highlight of plate edge at right side with pen tool and stroke with 2px brush pressure with white color..
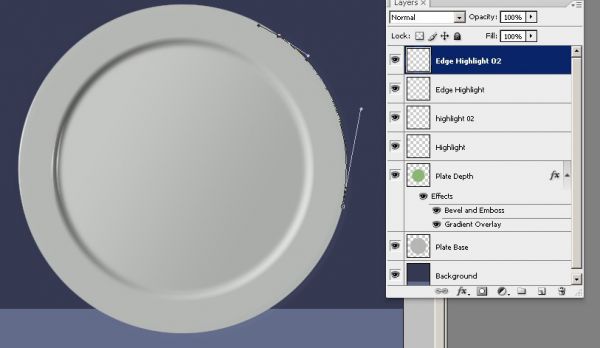
Step 20
Placement of 4 highlight.
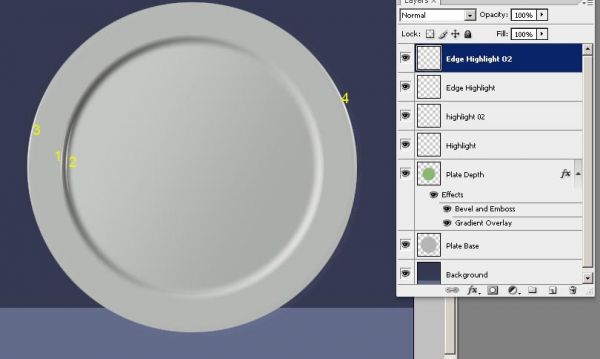
Step 21
The plate is complete. These step are optional for making plate more beautiful and realistic. Any flower picture can also be used for decorating it. In this step I am using photoshop default shapes for this purpose.
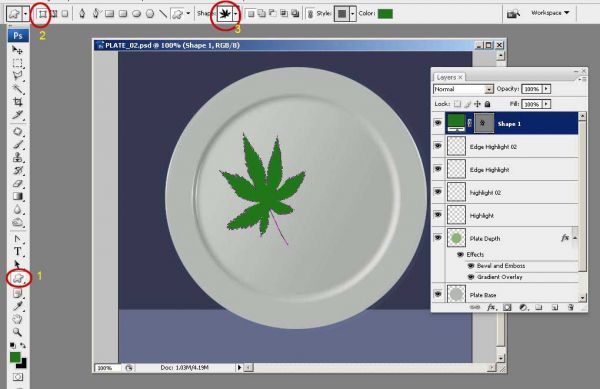
Select custom shape tool , click on shape layer button, select leave2 shape and draw leave custom shape.
Step 22
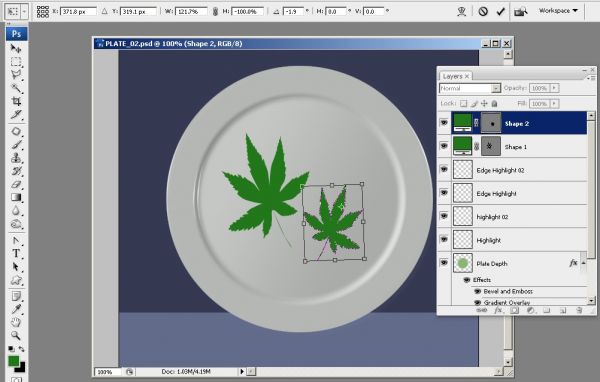
Create another leave shape, rotate and resize with free transform tool. Shape will be fill with foreground color.
Step 23
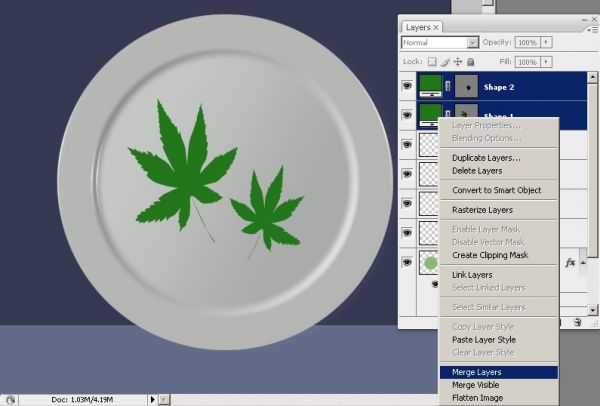
Select both leave custom shape layers, right click and choose command "Merge layers", which will merge and rasterize both layers.
Step 24
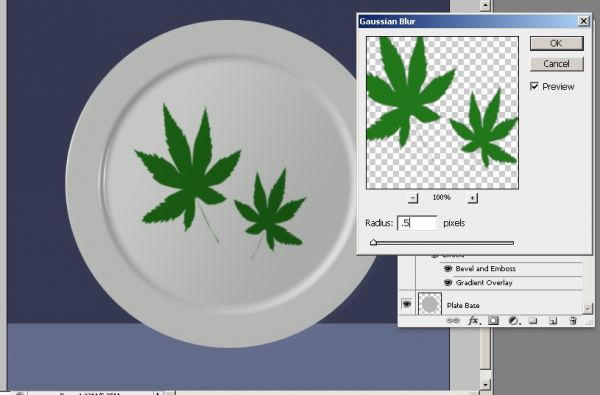
Apply Filter - Blur - guassian blur of 0.5 radius to merged leaves layer.
Step 25
Set blending mode of leaves layer to multiply and reduce opacity to 60.
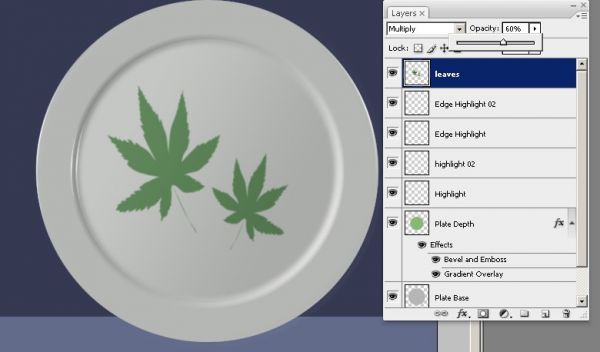
Step 26
Finally create new layer above background and name it shadow. Now draw some shadow with soft brush as shown in picture.
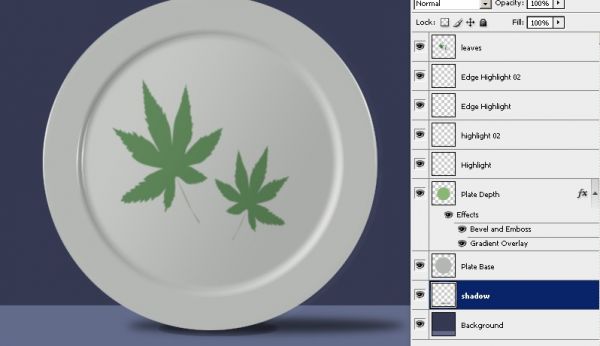
Step 27
Have fun!
Hope you can learn something new from this tutorial.
I feel really glad if you give me feedback through comment below. Soon i am going to show more interesting & innovative tutorials so please keep visit our blog. That’s for now.
Have fun!
Feel free to contact with Clipping Design for clipping path service, image editing service, image masking service or any kind of design support.
Thank you…
Credit: pxleyes
This blog is really remarkable. Thanks for sharing this great stuff. Keep sharing more useful and conspicuous stuff like this. Thank you so much. Lets have look to my website http://clippingpathsource.com/ Have Fun!!
ReplyDeleteThanks for the post. I'm also an expert and i have just began writing blogs which i believed was very hard to do until I read your own article. I found your blog handy with fresh thoughts I did not know ahead. In the next few weeks, I'll be busy writing a number of articles for my own new blog. I'm hoping people will find them useful like yours. Please visit http://clippingpathsource.com/ to know more about clipping path.
ReplyDeleteExcellent. Please keep up the good work for the concise and informative articles. This is more informative than other media, I really like following your blog as the articles are so simple to read
ReplyDeleteClippinh factory india