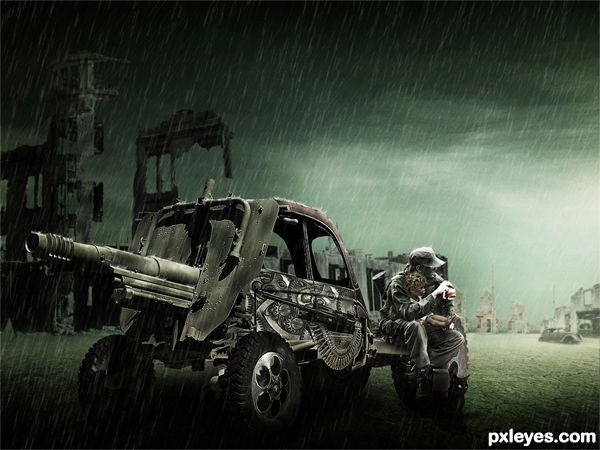
Step 1
Preparing the source
All you need to do is selecting good stock pictures, doing experiment on using Free Transform Tool and Adjustment layers to set the mood and lightning. Here are the stocks needed to manipulate the thing I called machine:
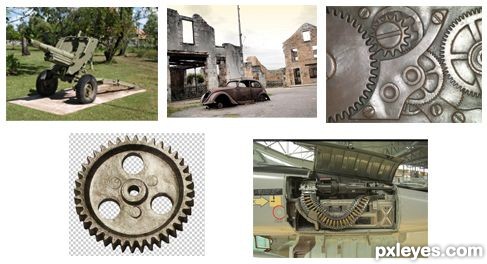
Step 2
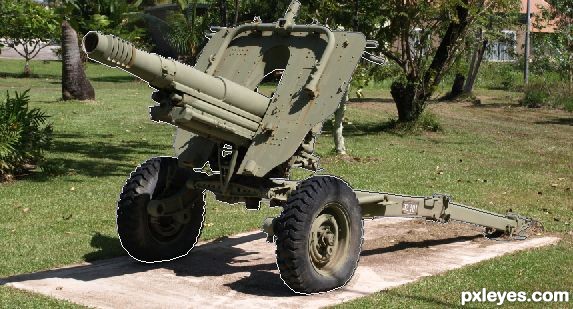
Create a new white document of 1200 pxl wide and 900 pxl high on photoshop (Ctrl+N). Open the stock picture of an old gun on the document.
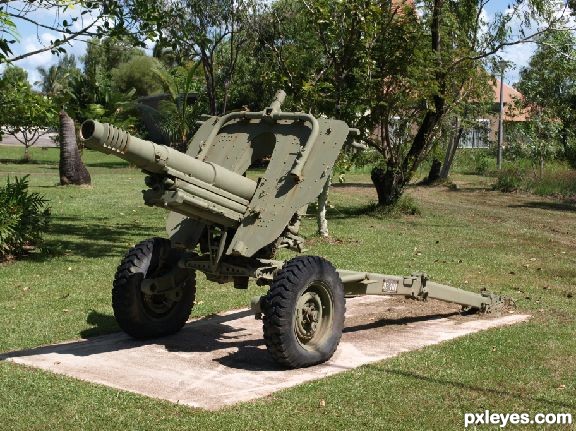
Step 3
We will extract the picture from its background. To achieve this, we will use Pen Tool. Activate the pen tool in the tool panel. Start tracing the picture with the pen tool by clicking every edge of the picture to make anchor point:
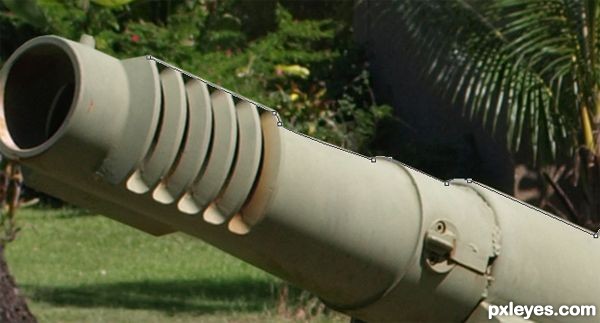
Step 4
Keep on clicking to trace the picture until the path is closed which is indicated by thin line around the traced picture:
Step 5
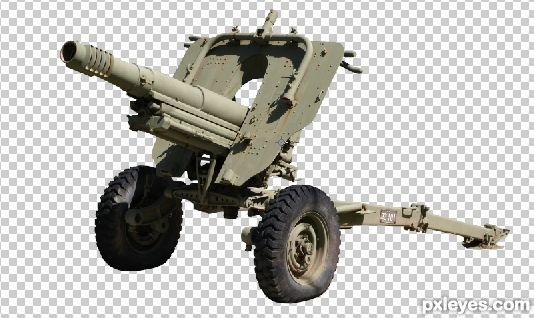
When the path is closed, right click on the path to show the path command option box. Choose Make Selection. This Make Selection option will change the path into selection. Hit Shift+Ctrl+I to inverse the selection and then hit Del to delete the background:
Step 6
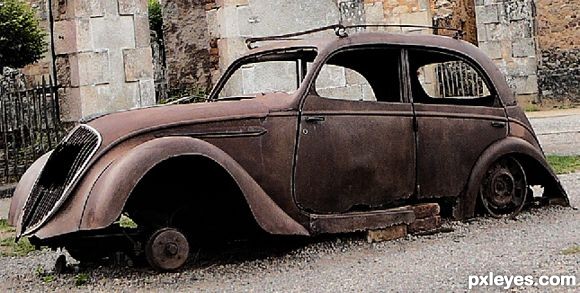
Open the other stock picture of an old rusty car:
Step 7
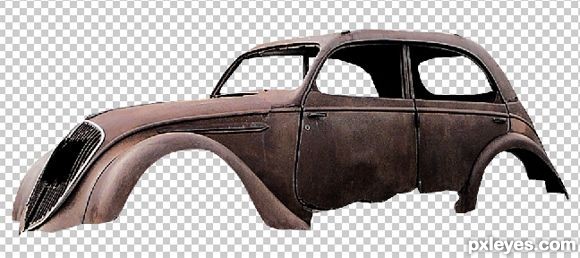
Just extract the picture with Pen Tool just like the same way in extracting the old gun picture. Here is the result:
Step 8
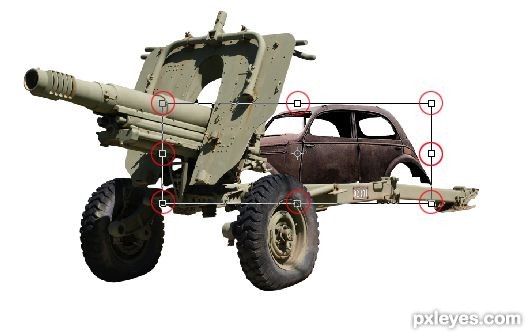
Now there are two extracted picture on the document. Make sure to place the old car picture behind the old gun picture. This means that the layer of the old car picture is underneath the layer of the old gun in the Layer Panel. Select the old car layer. Now hit Ctrl+T to activate Free Transform Tool which is indicated by some transforming points around the selected picture:
Step 9
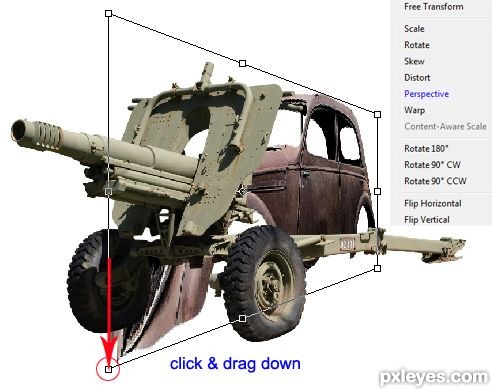
When the free transform tool is activated, right click on the document to show the command option box. Choose Perspective. Click and drag the lowest left corner point down. Refer to the old gun picture as reference to determine the perspective of the old car. Technically, the image will look like the one on the illustration below :
Step 10
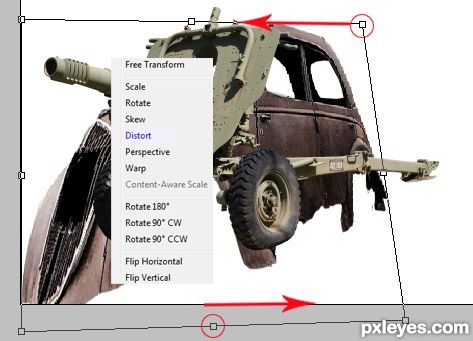
Distort the picture a bit to get the fit result:
Step 11
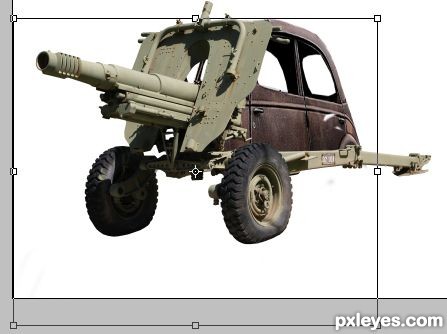
Finally, erase the unnecessary parts of the car. Here is the result I created:
Step 12
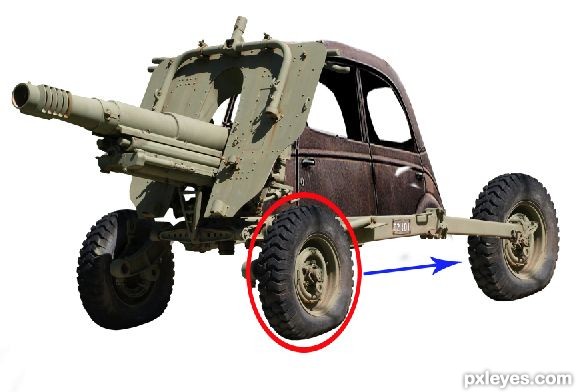
Next is adding rear wheel. What you need to do are:
1. Take pen tool again in the tool panel. Trace the left front wheel by clicking to make path
around the wheel until the path is closed.
2. Right click on the document to show the path command options. Choose make selection.
3. When the wheel is selected, hit Ctrl+J to duplicate it into a new single layer.
4. Finally, move (hit V to activate the Move Tool) the duplication to rear side of the machine. Make sure to place this duplicated wheel layer below the main body layer in the layer panel.
Step 13
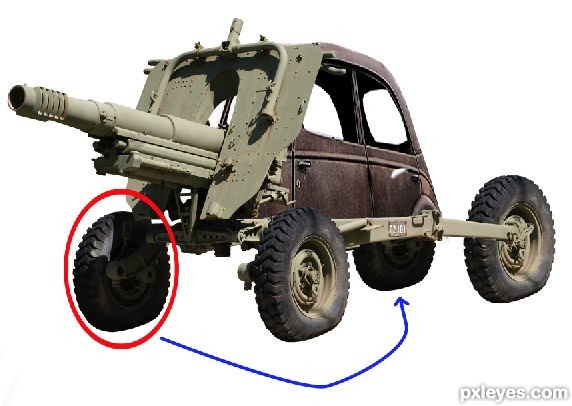
Do the same way to add the other rear wheel:
Step 14
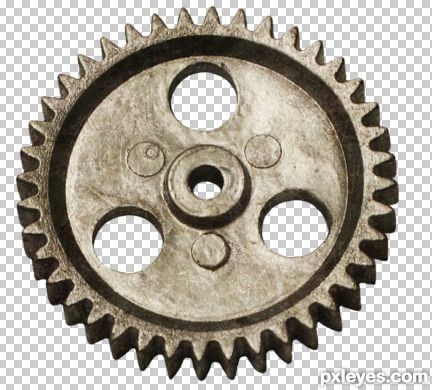
From this step on, we will add rims for the wheel. We will manipulate the rims from this image of a gear. Since the gear is in png formatted file, we will simply copy-paste the image to the document. We do not need to be got bother by extracting because the image itself has already got transparent background.
Step 15
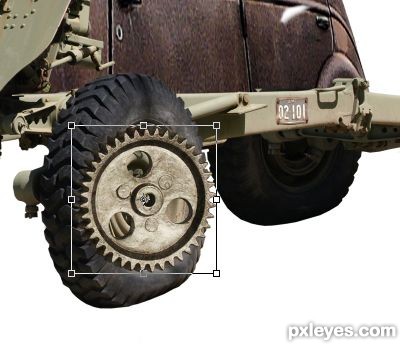
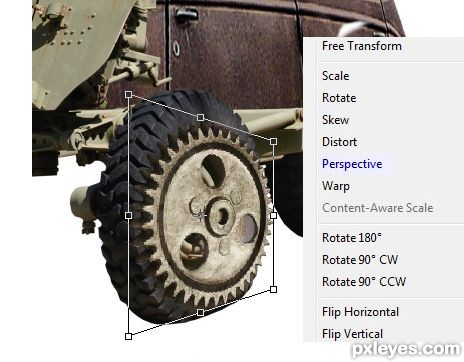
Place the rim ( I call the part rim ) above the wheel. Hit Ctrl+T to activate the Free Transform Tool again:
Step 16
Transform the rim to fit the perspective of the wheel:
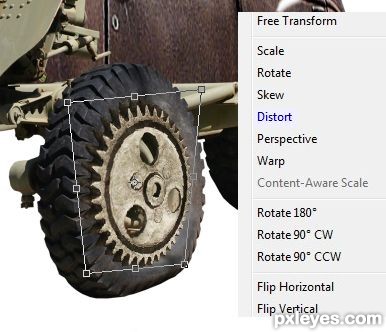
Step 17
Distort the rim to get the best result:
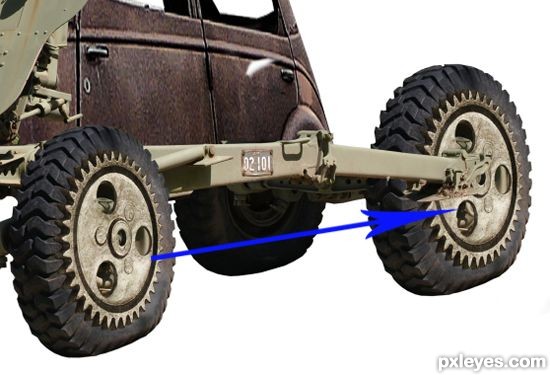
Step 18
Duplicate (Ctrl+J) the rim and place the duplication on the rear wheel:
Step 19
We have completed parts of the machine ( I call this thing machine ). Next, we will decorate the look of thee machine by adding some metal textures. I used this image for this purpose:
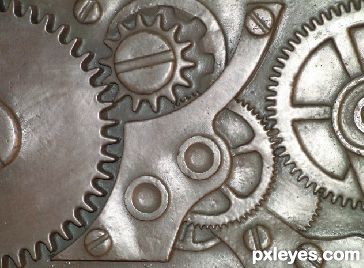
Step 20
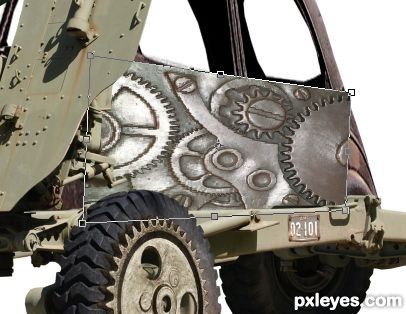
Open the texture on the document. With Free Transform Tool, arrange the perspective of this texture to fit the entire image:
Step 21
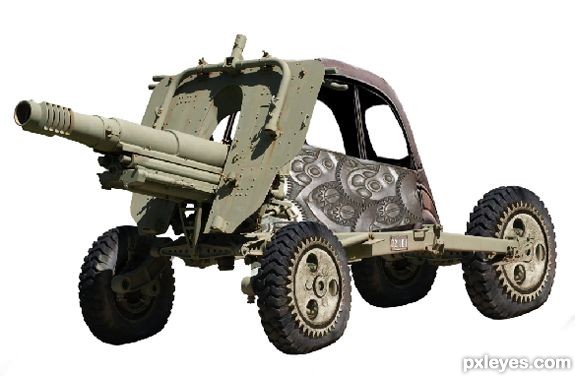
Duplicate the texture as needed. Scale and place the duplications where needed. Remember to mask some unneeded parts of the duplications. I kept the blending of the duplication layers in normal at 100% opacity. Please see the illustration picture as the inspiration of the result I created. Do not stick to get exactly the same result as the one I created. In this part we can try to create different texture shapes.
Step 22
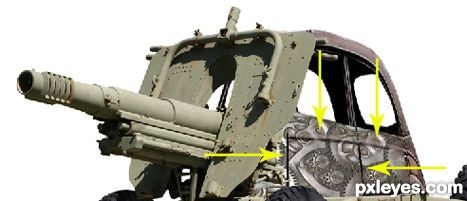
If we have found the best shape, select all the texture layers and group them (Ctrl+G). Give this group layer a layer mask. Mask the lines on the car. Please see the illustration picture:
Step 23
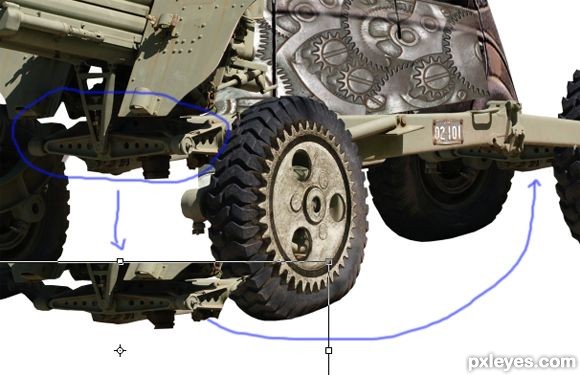
Finally, to complete the machine, I selected and duplicated the part between the front wheels and add the duplicated part to the rear wheels. Please refer back to previous step 12 on how to do this.
Step 24
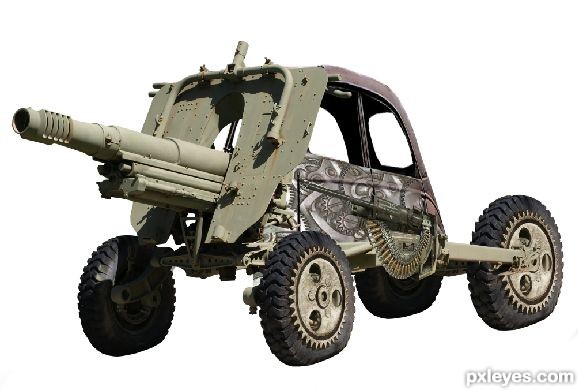
Here is the final result I created after adding a machine gun which was cut out from the other provided stock image. Please refer the previous step to see how to use pen tool to cut the machine gun and how to transform the cut out to fit the perspective.
Step 25
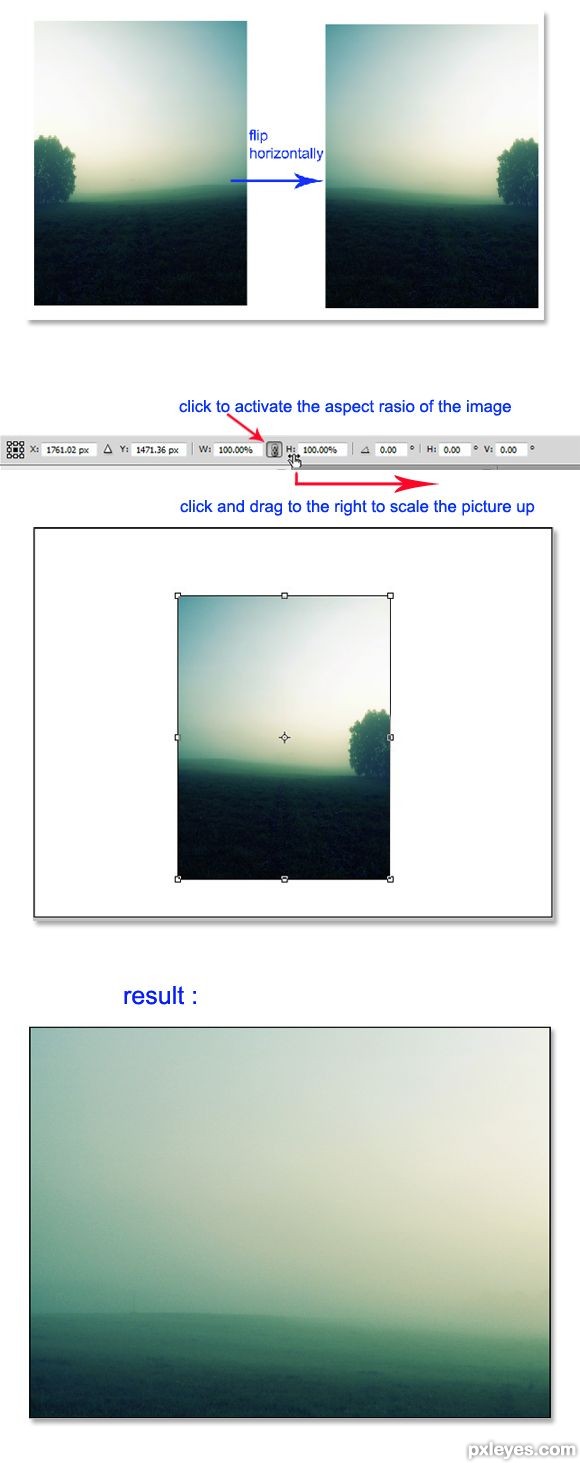
Create another new document of 1200 pxl wide and 900 pxl high. Open the stock picture. We will create the background for the scene. After opening the stock picture, flip it horizontally. Hit Ctrl+T to activate the free transform tool again. There will be a manu bar for the tool above the document. Click thechain icon and put the cursor near the icon, when the pointing hand icon comes up, click and drag to the right to scale the picture up. See the result I created:
Step 26
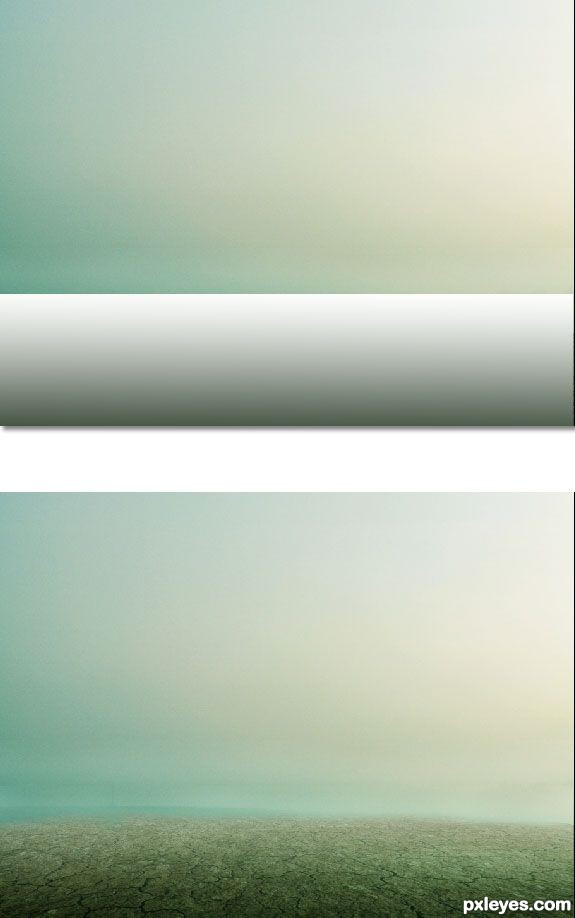
Open the cracked soil picture on the document. Transform the picture to get the best result needed:

Step 27
To blend the soil well into the scene, give this soil layer a layer mask and mask the upper part of it. Then reduce its opacity a bit to 60%. Next is create a new layer (Shift+Ctrl+N). On this new layer, make a selection on the lower part of the document. We will fill this selection with Gradient. Set the color of the foreground to white and the background to #0b5f04. Take Gradient tool. Make sure to choose Linear Gradient. Finally create gradient on the selection. Give this layer a layer mask and with soft round brush, masked the top edge of the gradient. Set the blending of this gradient layer to Soft Light at 55% opacity.

Step 28
Create another new layer. Make a selection on the lower part of the document and fill the selection with another gradient. For this gradient, set the foreground color to white and the background to #021701. Mask the top edge and set this gradient layer to Soft Light at 100% opacity.
Step 29
In this step, we will add cloud to the scene. Open the other stock picture. Scale the picture to fit the canvas. Mask the lower part of the image. To match the color of this cloud to its surrounding, we will add it color adjustments. Firstly, go to Layer > New Adjustment Layer > Color balance. Then, give the other adjustment layer: Hue/Saturation. ( please see the illustration picture for the settings). Make sure to create clipping masks for these adjustment layers. Mask a little bit the hue/saturation layer on the cloud part. Finally, set the blending of the color balance layer to Multiply at 100% opacity and the hue/saturation to Screen at 100% opacity.

Step 30
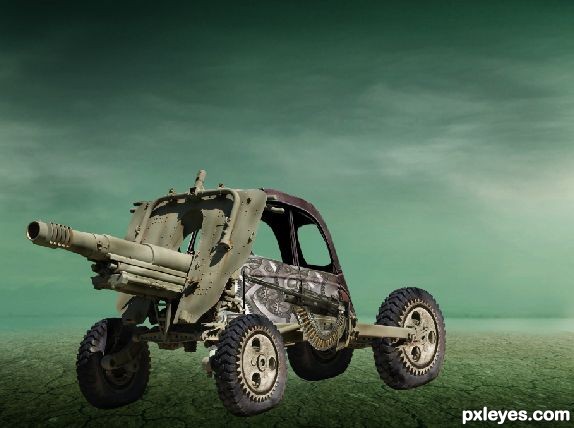
After finishing the background, copy - paste the ‘machine’ to the canvas:
Step 31
Next, open the soldier picture. Extract the soldier from its background. Scale and place it on the canvas:
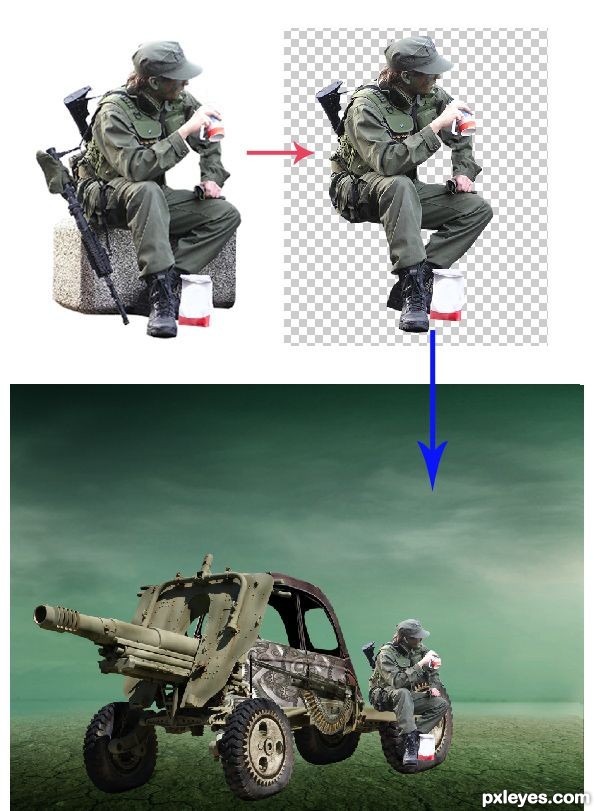
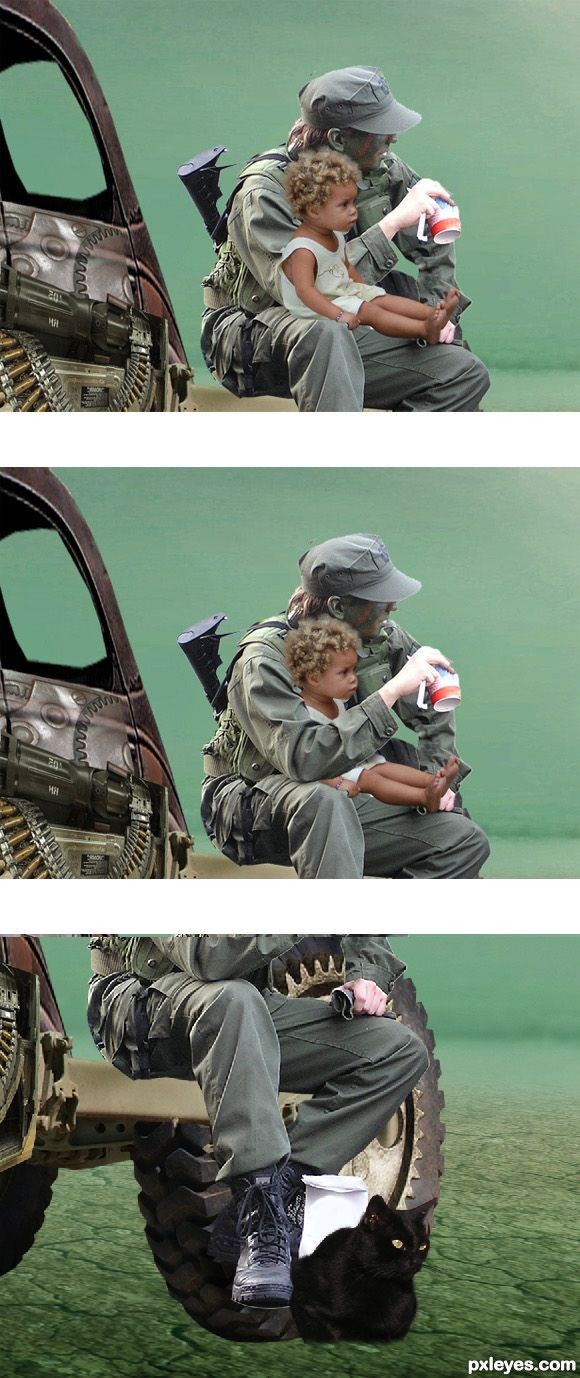
Step 32
Proceed to add the child to the canvas. Scale and place the child in front of the soldier’s right arm. Give this child layer a layer mask and mask part of the child to make it looks as if she were in the soldier’s arm. Finally, add the cat to the scene.
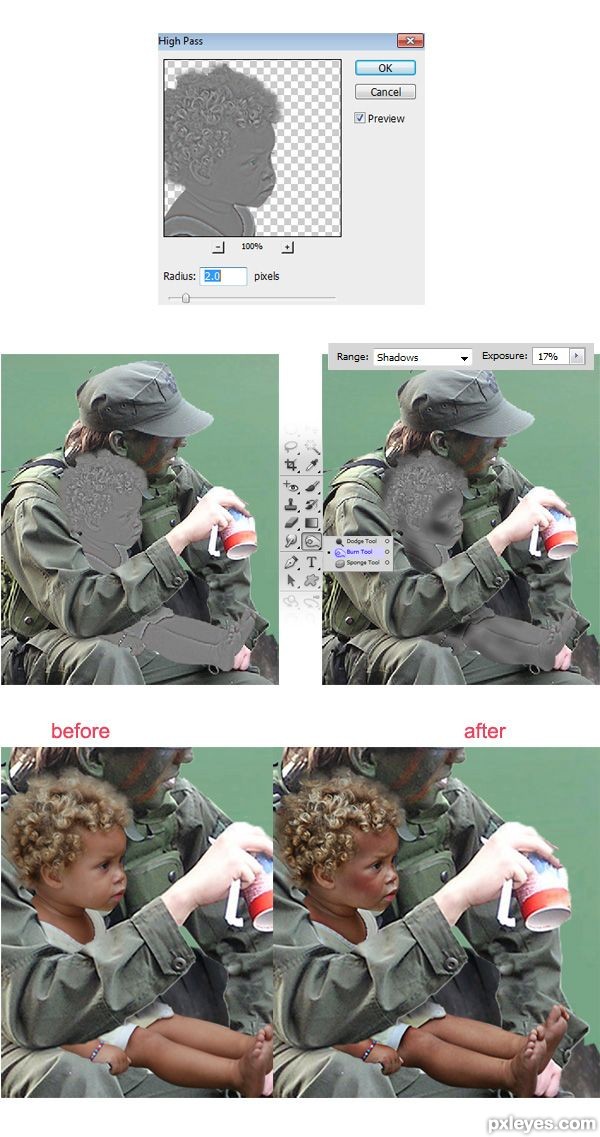
Step 33
In this step we will treat the look of the child. We have to make as if she were desperate. Duplicate the child layer. Go to Filter > Others > High Pass. Take Burn Tool in the tool panel. With soft round brush at low opacity (10-20%), stroke the areas on the face, legs and the other skin. Finally, set this high pass layer to Overlay at 100% opacity.
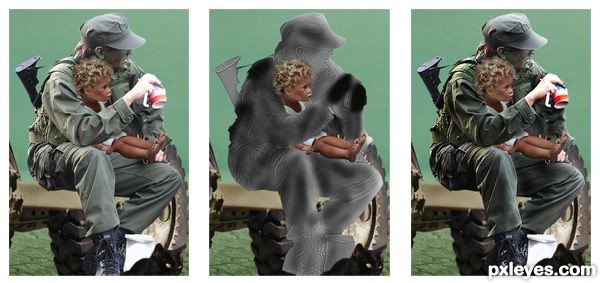
Step 34
Do the same way as the previous step for the soldier.
Step 35
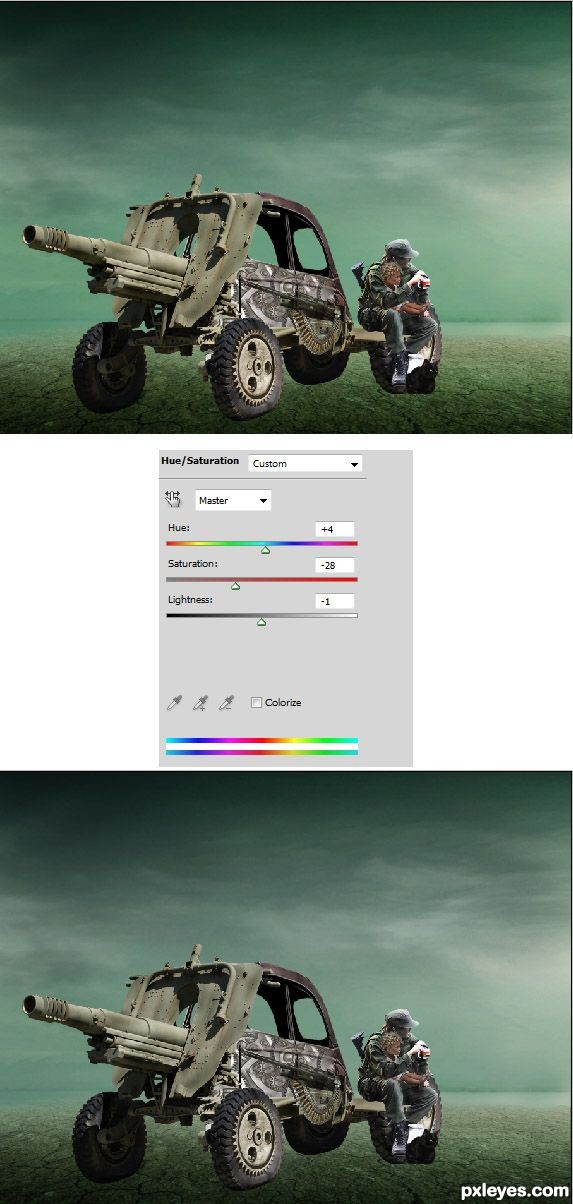
Finally, to set the entire tone of the scene, I decided to give it another adjustment layer: Hue/Saturation above all the other layers.
Step 36
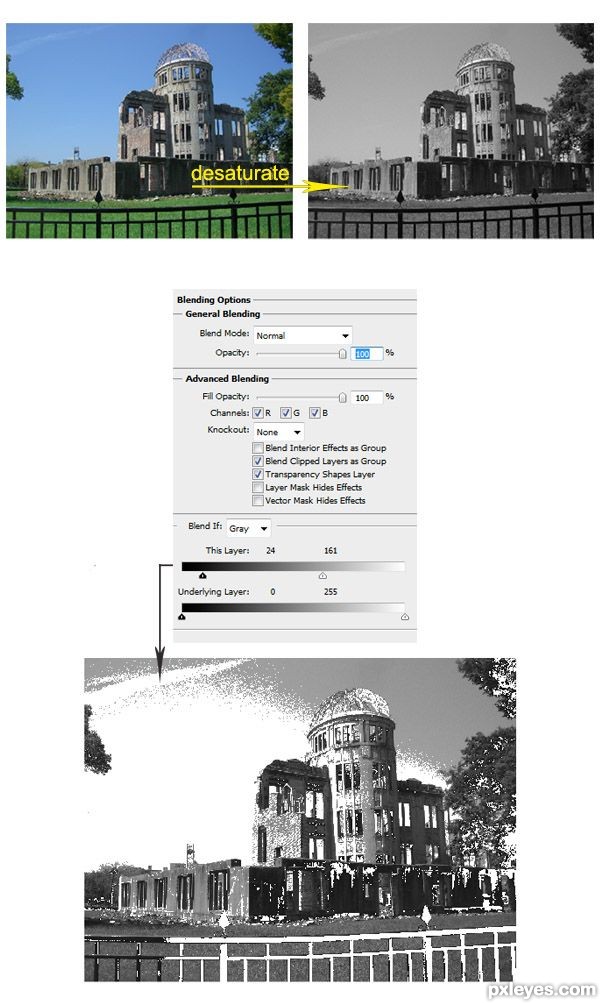
We will add some destroyed building to the scene. Open the building picture on the canvas. Go to Image > Adjustment > Desaturate. With the building layer still selected, go to Layer > Layer Style > Blending Option. See the illustration picture to see the setting for the blending option.
Step 37
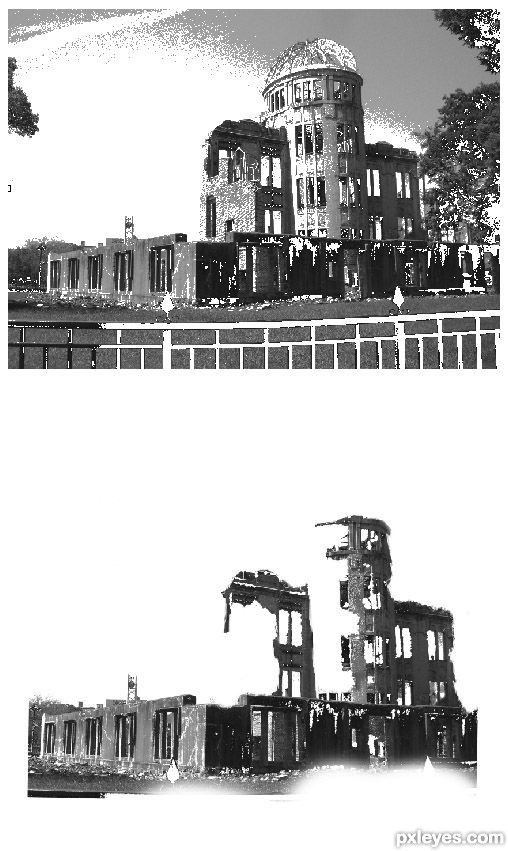
Mask unnecessary part of the building. Used scatter brush to create the effect of destruction on the building.
Step 38
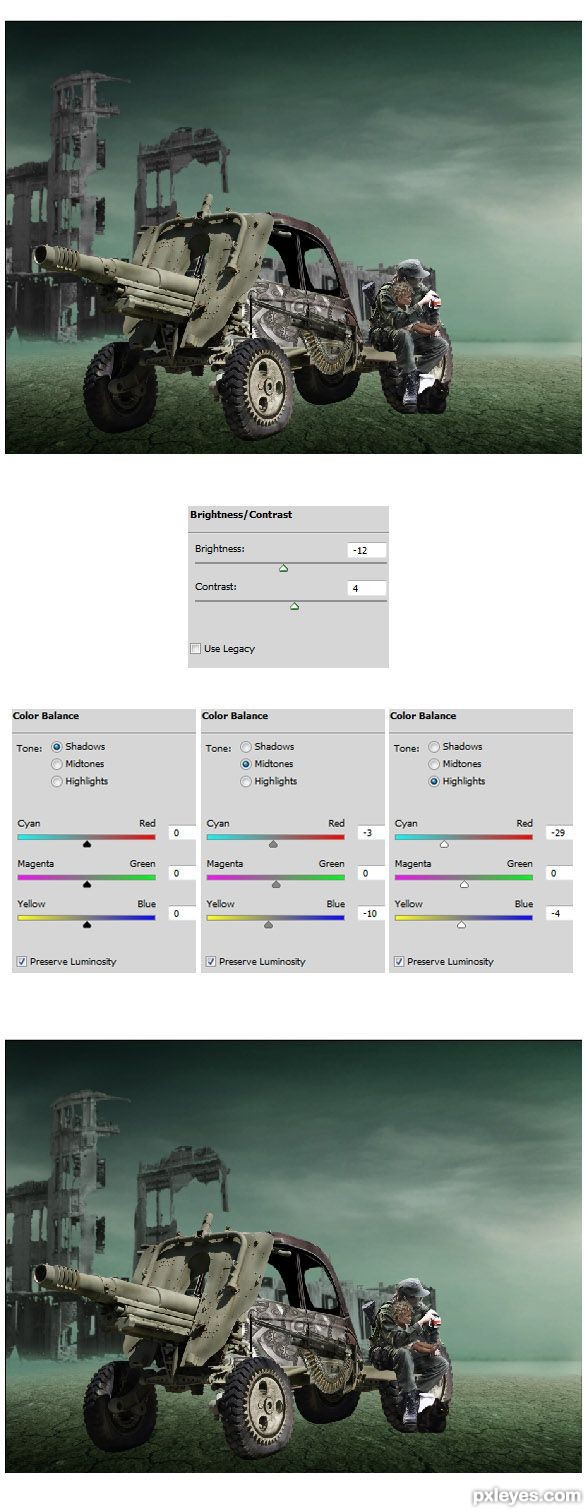
Scale and place the building on the canvas. Give this building Gaussian blur a bit. Finally add this layer new adjustment layers: Brightness/Contrast and Color Balance. Make sure to create these adjustment layers clipping masks.
Step 39
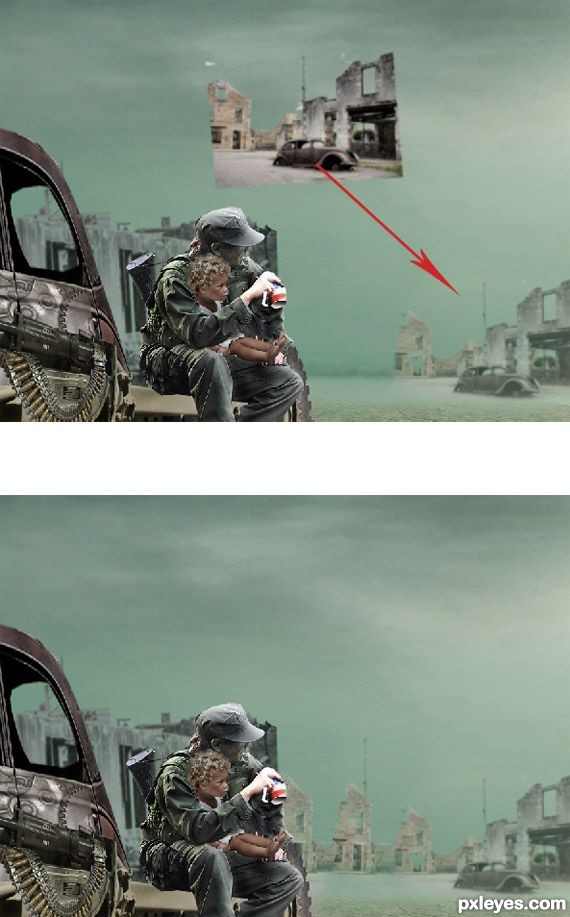
To complete the composition, we will add the other building. Open the ruin city stock picture. Flip it horizontally. Scale and place as farer building. Duplicate this layer. Arrange the duplication pictures in the position needed to complete the composition. Give them Gaussian Blur to set the depth of the image.
Step 40
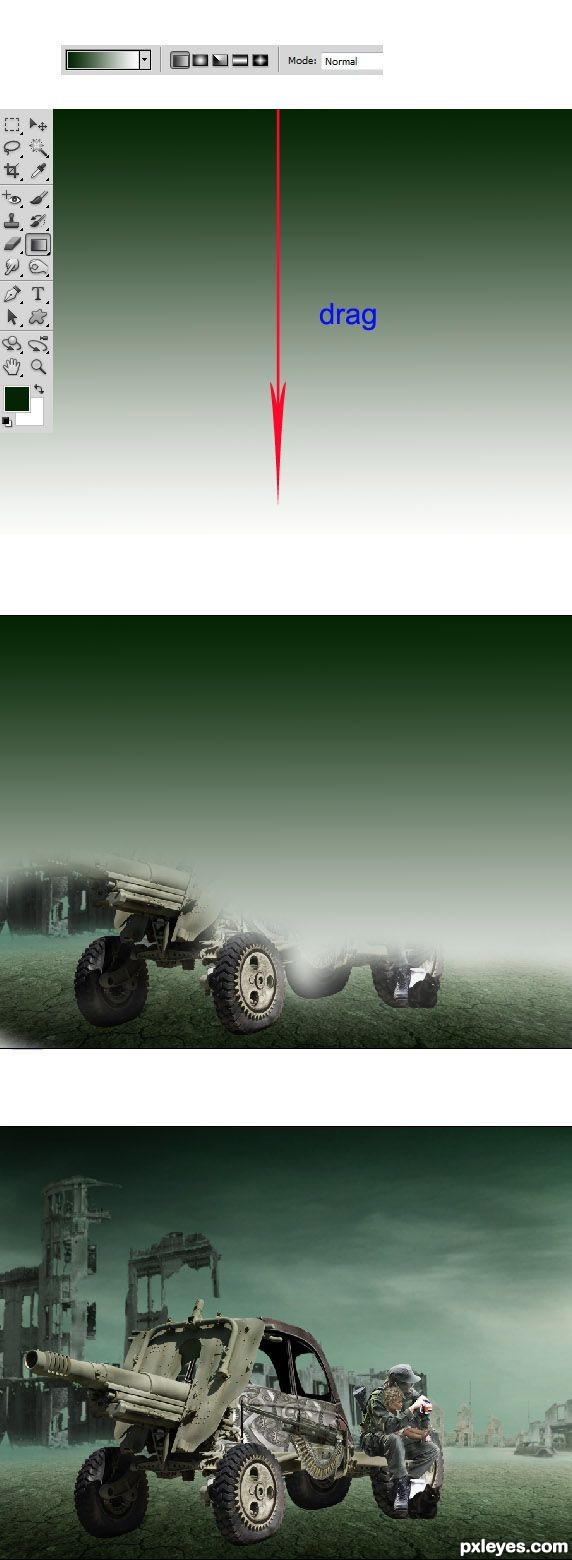
Create a new layer. Fill this layer with linear gradient of #032501 to white. Then, mask lower part of the gradient layer. Finally, set this gradient layer to Soft Light at 45% opacity.
Step 41
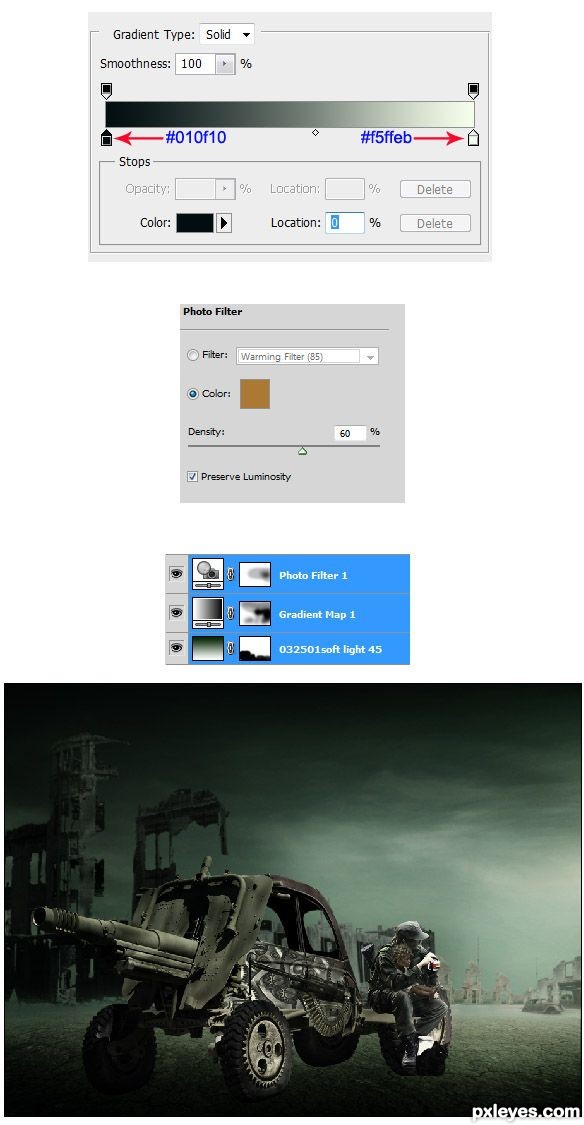
Create the other two adjustment layers above all the other layers. First, add Gradient Map, mask some parts of this gradient map layer and then set it to Multiply blending at 100% opacity. Next, give Photo Filter. Mask this layer as well on some part and set its blending to normal at 40% opacity.
Step 42
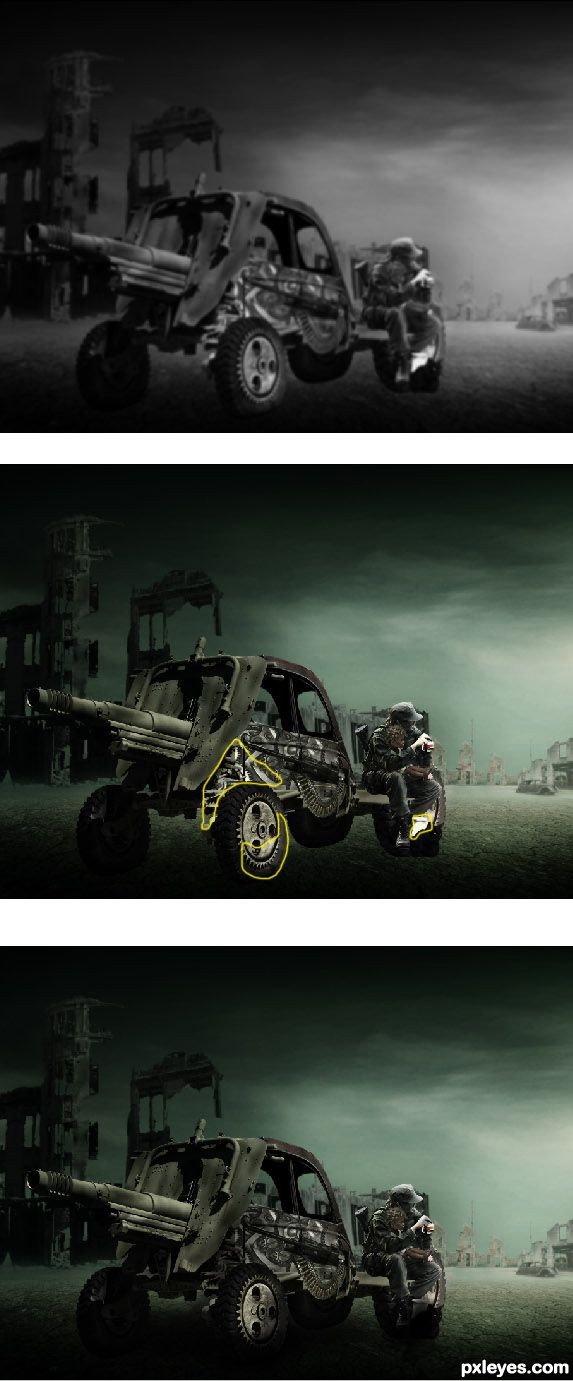
Hit Shift+Ctrl+Alt+E to stamp the visible layer. There will be a single layer above all the other layers. Desaturate this layer and give it Gaussian Blurwith radius at 7 pixels. Set this layer to Soft Light at 25% opacity. Next, create another new layer. Take Brush Tool. Choose a very soft brush at 20 opacity. With black color, stroke distracting areas on the scene ( marked in yellow). Please see the illustration image.
Step 43
The image is a bit dark. We will add another adjustment layer: Brightness/Contrast to the scene. Finally, hit Shift+Ctrl+Alt+E to stamp again all the visible layers. Give this stamped layer High Pass filter at radius 7% to sharpen the image. Mask the area of the buildings. Set this layer to Soft Light at 100% opacity.
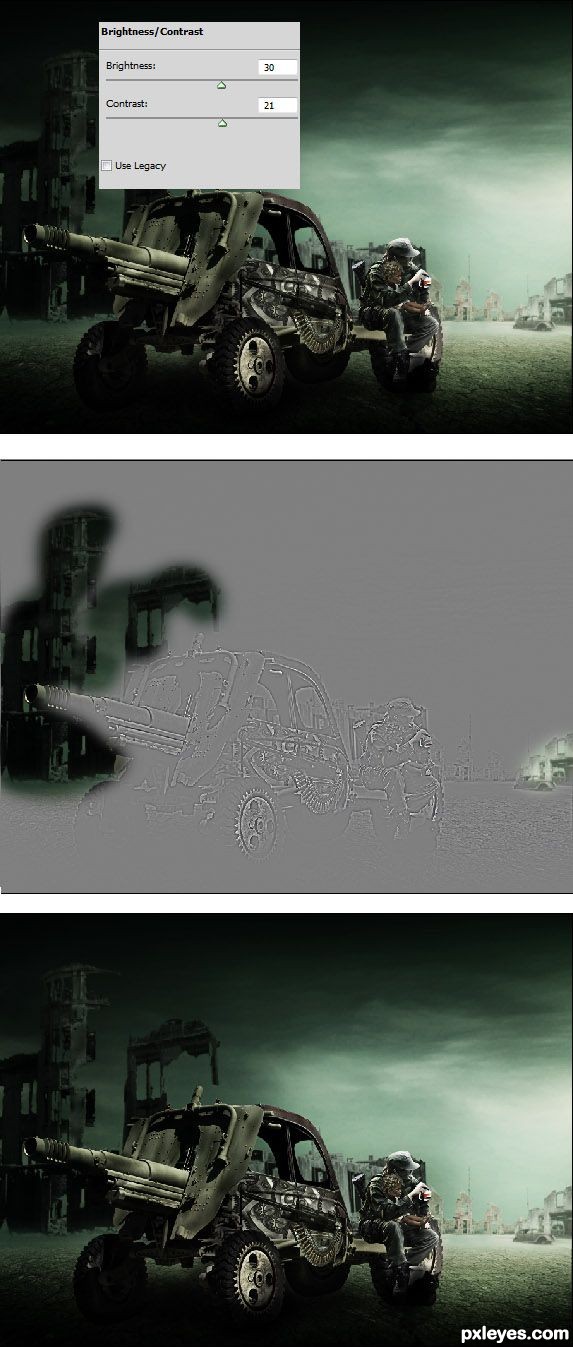
Step 44
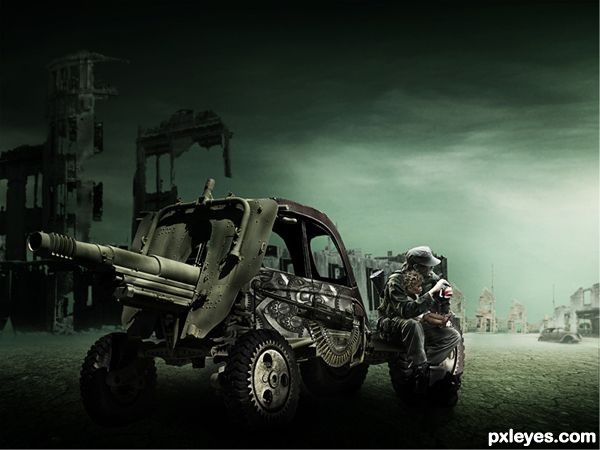
Finally, to complete this work, on a new layer I stroked a black colored soft brush at 15-20% opacity on the areas under the machine and the soldier to define more shadow. So here is the final result I created:
Step 45
Or....optionally, to set more dramatic scene, I tried to add rain on the picture. I also used different rims for the wheels:
Hope you can learn something new from this tutorial.
I feel really glad if you give me feedback through comment below. Soon i am going to show more interesting & innovative tutorials so please keep visit our blog. That’s for now.
Have fun!
Feel free to contact with Clipping Design for clipping path service, image editing service, image masking service or any kind of design support.
Thank you…
Credit: pxleyes.com
very interesting blog post, good job and thanks for sharing such a good blog. Background Removal Services
ReplyDelete