
Today
i would like to share easy method to change your hair color in
pgotoshop. In this tutorial we use fantastic hair effect for creating
stylish looking. So why not have a try...

**NOTE**
I did this tutorial in Photoshop CS3 Extended which is why some of you may have problems. However, that does't mean this tutorial won't work in other versions of Photoshop. Just try it out.Ever wanted to change your hair color to purple, green or red? Well now you can. Just follow my tutorial, & you'll have any hair color imaginable! For this tut, I'm going to use the cute Naima Mora from ANTM.
Here's the before:
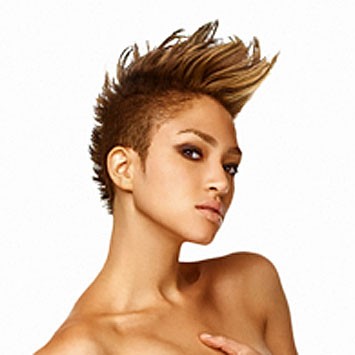
Here's the after:

Okay, let's begin!
001.Open up your image in photoshop. Now select the "create new fill or adjustment layer" icon & select "Hue/Saturation."
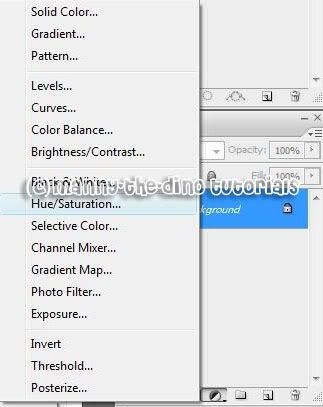
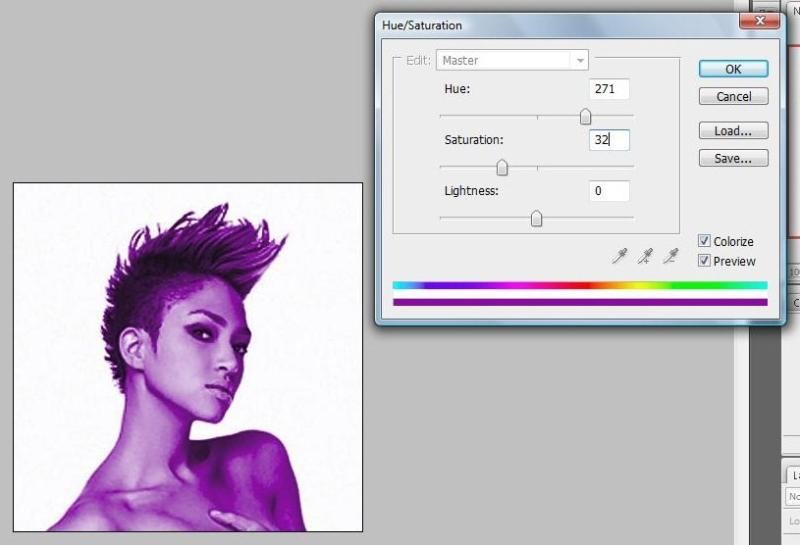
002.Check the "colorize" box & play with the hue & saturation to get the color you want. If you want to use my color, the hue is 271 & the saturation is 32. Then click ok. (yes the person in your picture is all in the color you chose but we'll fix that)
003.Now with your "Hue/Saturation" layer selected, press ctrl+backspace to fill the layer with black.
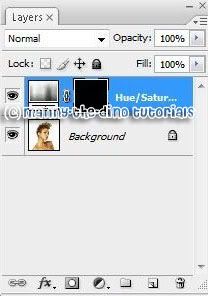
004.Now select your brush tool so we can start to color the hair.

005.We need to paint with white on the layer mask to reveal the colorizing effect on the hair, and Photoshop has already set our Foreground color to white for us, as we can see in the Foreground and Background color swatches near the bottom of the Tools palette.

006.Using the brush tool, start painting over the person's hair in your picture.
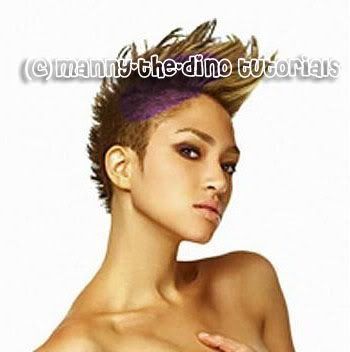
007.When you're done, it should look like this:
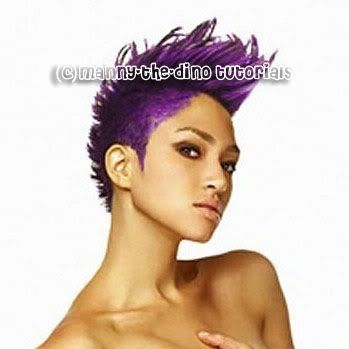
008.The hard part is done! We've colorized the hair while leaving the rest of the image as it was. Now we can fine-tune the effect, and the first way to do that is by changing the blend mode of the adjustment layer. Select either "Color" or "Soft Light" from the list. Or you can choose other options just to play around with it.

009.This is how my image looks like with the blending mode in color:
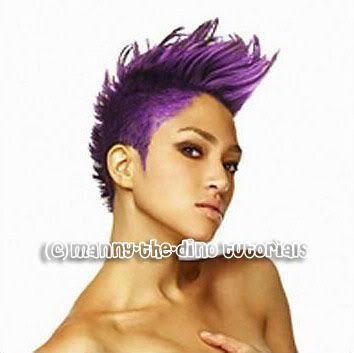
010.If you want to change the color of your hair, just simply double-click on the Hue/Saturation adjustment layer's thumbnail in the Layers palette & play around with the hue & saturation. (for that green, I used 111 for the hue & 32 for the saturation.
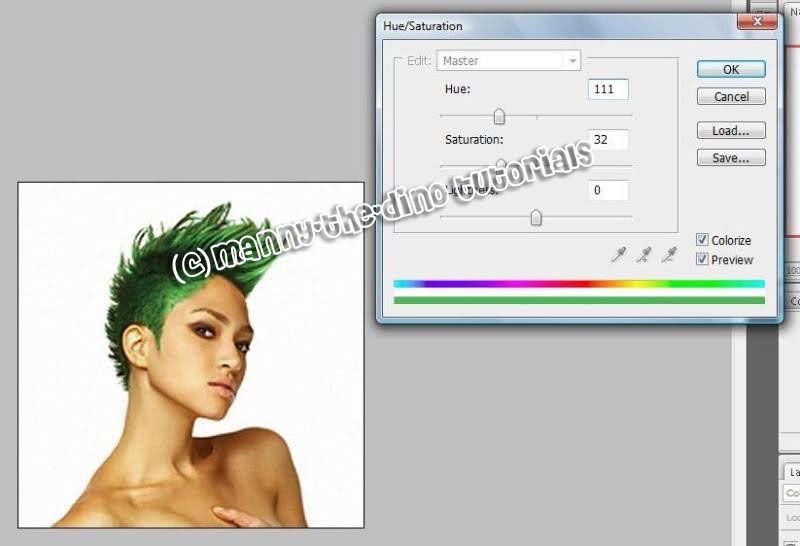
011.And there you go... you have your final product! :)

I did this tutorial in Photoshop CS3 Extended which is why some of you may have problems. However, that does't mean this tutorial won't work in other versions of Photoshop. Just try it out.Ever wanted to change your hair color to purple, green or red? Well now you can. Just follow my tutorial, & you'll have any hair color imaginable! For this tut, I'm going to use the cute Naima Mora from ANTM.
Here's the before:

Here's the after:

Okay, let's begin!
001.Open up your image in photoshop. Now select the "create new fill or adjustment layer" icon & select "Hue/Saturation."

002.Check the "colorize" box & play with the hue & saturation to get the color you want. If you want to use my color, the hue is 271 & the saturation is 32. Then click ok. (yes the person in your picture is all in the color you chose but we'll fix that)

003.Now with your "Hue/Saturation" layer selected, press ctrl+backspace to fill the layer with black.

004.Now select your brush tool so we can start to color the hair.

005.We need to paint with white on the layer mask to reveal the colorizing effect on the hair, and Photoshop has already set our Foreground color to white for us, as we can see in the Foreground and Background color swatches near the bottom of the Tools palette.

006.Using the brush tool, start painting over the person's hair in your picture.

007.When you're done, it should look like this:

008.The hard part is done! We've colorized the hair while leaving the rest of the image as it was. Now we can fine-tune the effect, and the first way to do that is by changing the blend mode of the adjustment layer. Select either "Color" or "Soft Light" from the list. Or you can choose other options just to play around with it.

009.This is how my image looks like with the blending mode in color:

010.If you want to change the color of your hair, just simply double-click on the Hue/Saturation adjustment layer's thumbnail in the Layers palette & play around with the hue & saturation. (for that green, I used 111 for the hue & 32 for the saturation.

011.And there you go... you have your final product! :)

Hope you can
learn something new from this tutorial.
Discover the
top most quality clipping
path, clipping
path service, photoshop clipping path
service or low cost clipping path, image
masking service
in reasonable price with quick turnaround time from Clipping Design, one of the most popular outsourcing clipping path service provider.
Clipping Design always ready to provide 100% handmade clipping path, photoshop clipping path, clipping path service, SEO service, image editing service & image clipping service with Guaranteed client satisfaction on top quality masking service
Clipping Design always ready to provide 100% handmade clipping path, photoshop clipping path, clipping path service, SEO service, image editing service & image clipping service with Guaranteed client satisfaction on top quality masking service
Thank you…
Reference: createblog
No comments:
Post a Comment