
I think it's important for beginner to learn to use the Refine Mask so that you don't waste any time using any other time-consming methods.
This tutorial require Photoshop CS5 + to complete - However it doesn't hurt to take a look even if you don't have them yet :)
Note: Check out this video tutorial if you have any difficulty following the steps:
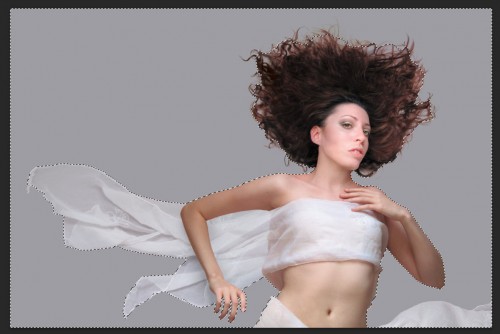
Let's load these two image into Photoshop. Copy and paste the model image on top of the background image. Grab the Quick Selection Tool and select the grey part of this model layer:
Important: Make sure you don't select any transitional areas around the area. In fact, the rougher the selection for hair, the better the result will be. Photoshop will fine-tune this selection for us later on, via the Refine Mask feature.
Click on the layer mask button on the layer palette to add a layer mask to this model layer:
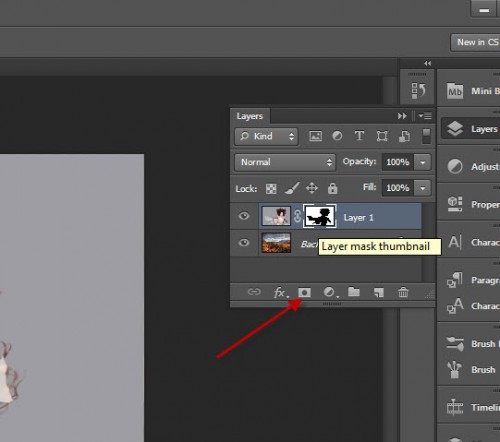
You will see the layer mask is applied to the grey part of this layer, and we want to invert this. To do this, we double-click on the mask to bring up the mask properties:
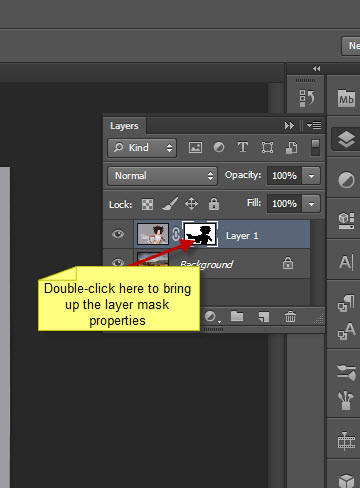
Click on the "Invert" button to invert the mask:
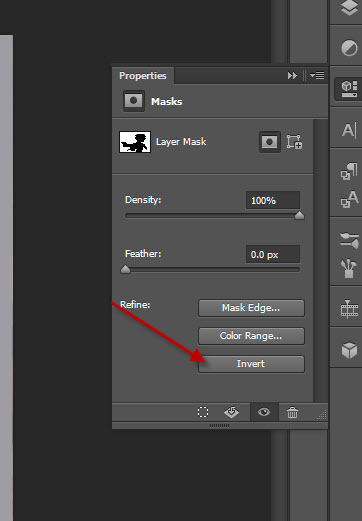
You can see the mask has been inverted and the model is now showing:

If you pay attention to the hair part, it needs some further work:

This brings us to the next part of the tutorial. Click on the "Mask Edge" button above the invert button:
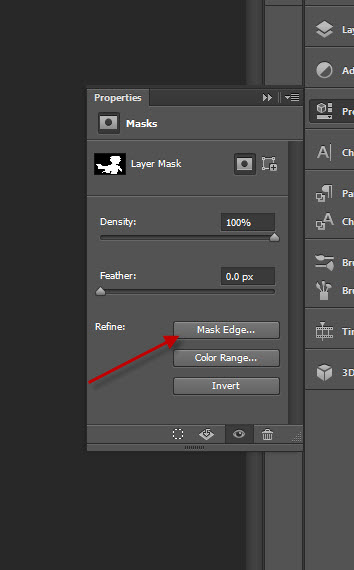
And you will see the Refine Mask window - our fun begins here!
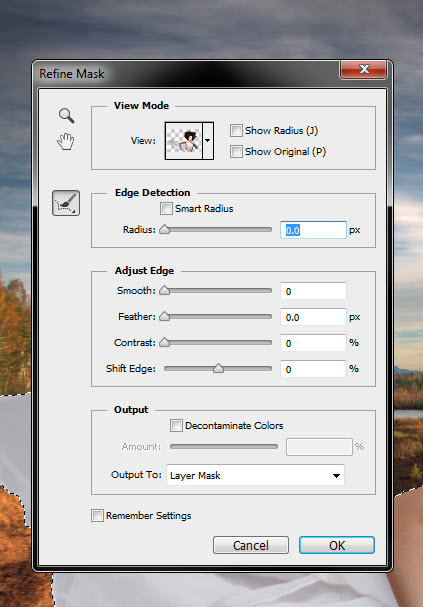
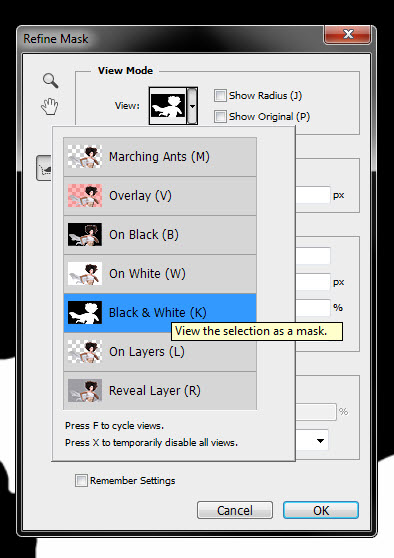
On the view mode, we will use the "Black and White" mode for now - please feel free to have a look at other modes:
Now we will want to have a look at our mask radius, so tick this "Show Radius" checkbox below:
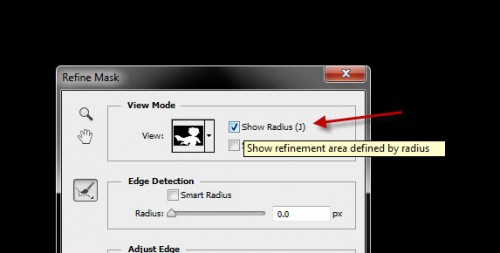
You will see only a black canvas after ticking this option - but if you increase the "Radius" value a sightly, you will see a white line appearing - that's the edge of our mask:
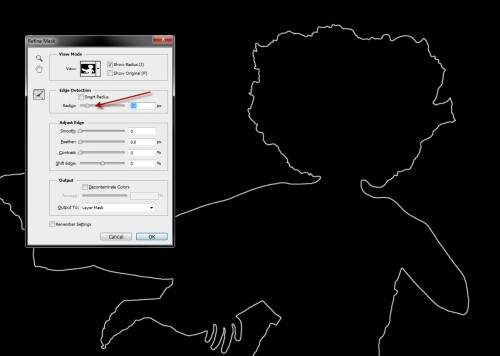
As we can see from the image above - the rest of the mask look fine, we will need to refine the hair part of the mask radious. To do this, we can use the "Refine Radious Tool":
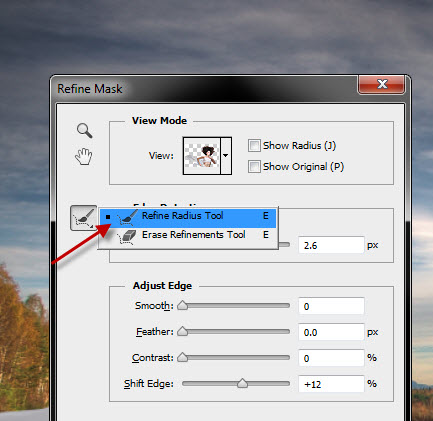
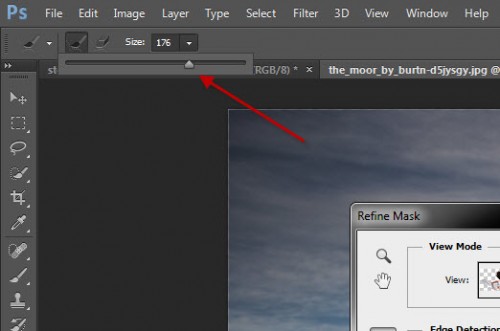
Adjust the brush size from the option bar as you see fit:
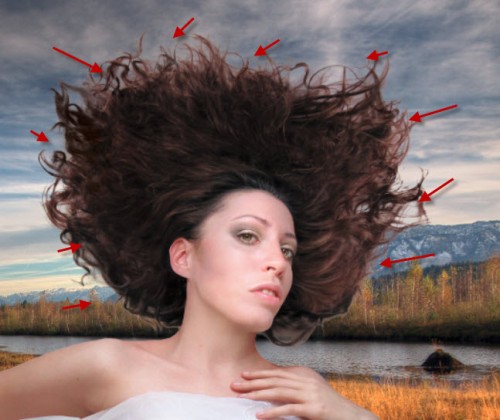
Use this brush to paint around the outside of the hair part, you will see the hair starting to appear nicely:
There is no need to adjust the edge - but we do need to apply the following "Decontaminate Colors" option to add some more details into the hair:
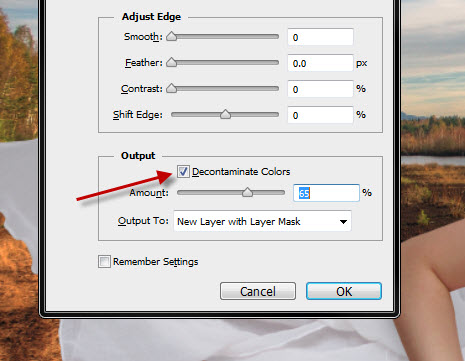
Click on "Ok" to apply this Refine Mask setting, you will see Photoshop creates a new layer automatically, and here is the before and after hair effect:
Before:
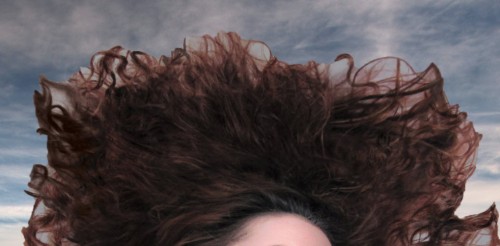
After

As you can see this Refine Mask feature has done something magical and now the hair looks a lot better :)

Hope you can
learn something new from this tutorial.
Clipping Design is the finest leading outsourcing
firm of the globe. It is a 24 hours onlineclipping
path service , clipping path, image
masking service,
graphics design, web and SEO
service provider.
Image dealing out services like outsourcing
clipping path,
image masking, creating shadows, image
colorization,
photo retouching, photo
editing&
graphics design is our specialty. We are moreover expertise in given that an
unswerving service with quick turnaround time, that’s why you can trust Clipping Design.Com.
Thank you…
Reference:
webdesign.org
No comments:
Post a Comment