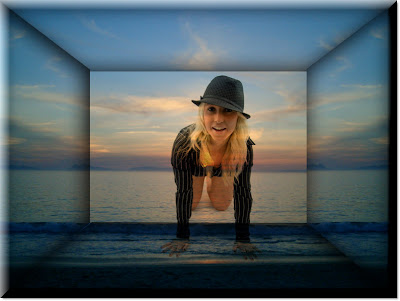
Today i would like to share how to create a fantastic 3D box using photoshop. In this tutorial we fantastic method about masking that's looks awesome. So, why not have a try...
Step 1 : I have opened this photo in Photoshop. A seascape or a scenery is the easiest to use for this tutorial.
Step 2 : Click the Polygon Lasso Tool from the flyout.
Step 3 : Click at the corner at the left top and drag with the Polygon Lasso and click again.
Step4
: After clicking the second point, press Shift and drag down. You will
be able to drag down in a straight line. Click again at the end of the
straight line.
Step
5 : After clicking on the third point, drag with the Polygon Lasso till
you reach the left bottom corner. Then drag up till you reach the first
point. When you reach the first point, a selection forms like this.
Step 6 : Press CTRL+J. The selection will be copied and pasted into a new layer in. You can see it in the Layers pallete.
Step 7 : Click the Add Layer Style button in the bottom of the Layers pallete and click on Inner Shadow from the popup.
Step
8 : In the Inner Shadow dialogue box I have increased the Opacity to 90
%, the Distance by 15 pixel, the Size by 100 pixel and lastly the Choke
by 10 %. There is nothing hard and fast about these settings. It might
differ in case of of you image. You will be able to see the effect as
you give the settings. Click OK.
This is how my image looks.
Step 9 : Press CTRL+J. Layer 1 duplicates into Layer 1 copy.
Step 10 : Go to Edit>Transform>Flip Horizontal.
Step 11 : Click the Move Tool.
Step
12 : Press Shift and drag the Layer to the right. Position it
accurately by using the Left and Right arrow keys when you reach the
right edge.
Step 13 : Click on the Background Layer.
Step14 : Click the Polygon Lasso Tool.
Step
15 : Click the First, Second, Third, Fourth and Final points with the
Polygon Lasso Tool. A selection forms when you click back on the First
point.
Step 16 : Press CTRL+J. The selection is cut and pasted onto a new Layer 2.
Step 17 : Click on Layer 1. Right click Effects. A popup appears. Click on Copy Layer Style.
Step 18 : Click on Layer 2. Right Click. From the popup click on Paste Layer Style.
The Effects and Inner Shadow has been pasted on Layer 2.
This is how the Photo now looks like.
Step 19 : Click on the Background Layer again.
Step 20 : Click again on the Polygon Lasso Tool.
Step 21 : Click on the points A, B, C and D and then click back on A. A selection forms.
Step 22 : Press CTRL+J. A new Layer 3 forms above the Background Layer.
Step 23 : Right click Layer 3. From the popup click on Paste Layer Style.
This
is how the image looks. Note that there is a gap at the edges where it
meets the left and right sides of the box. This may well happen.
Step 24 : Press CTRL+T. A selection forms.
Step 25 : Drag the middle handle downwards till the left bottom edge aligns with the left and right panels. Press Enter.
Step 26 : Press Ctrl+T. Press Alt and drag the right or left middle handle outwards till the top corners align.
Press enter to apply the transformation.
Step 27 : Click on thetopmost layer.
Step
28 : I have opened this photo with a White background. Press CTRL+A,
then CTRL+C. It's easy when you have a white background.
Step
29 : Go back to the other image and press CTRL+V. The photo will be
pasted. The photo that I have chosen is too large and has to be reduced
in size.
Step 30
: Press CTRL+T. Then press Shift+Alt and drag down diagonally. Let go
of Shift+Alt. Use the Move Tool to drag it up. Then again press
Shift+Alt and drag down. Do this till the image is resized properly.
Press enter to apply the transformation.
Step 31
: The photo has been resized. Move it to the midde with the Move
Tool. Use the Left and Right arrow keys to fine tune so that the image
is in the middle.
Step 32 : Click where the arrow points to, to reveal the popup menu of Blend Modes and click on Multiply.
Hope you can learn something new from this tutorial.
Get excellent quality clipping path service, clipping path, low cost clipping path or masking service from Clipping Design. Clipping Design always assure photo masking service, photoshop clipping path service, image editing service at quick turnaround time with Guaranteed client satisfaction on top quality image clipping service .
Thank you ......... :)
Reference: photoshopper27


No comments:
Post a Comment