
In this tutorial we will explain how to create "awesome" 3D-style typography using illustrative techniques in Photoshop. This
tutorial does not utilize any 3D apps or tools and relies heavily on a
good sketch, as well as your ability to apply proper light and shadow.
Let’s get started!
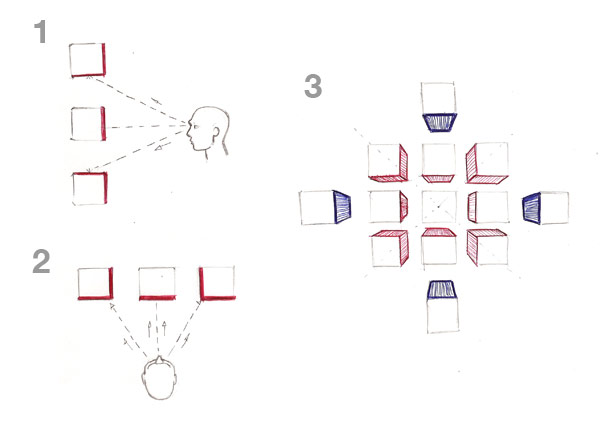
Before we begin, let’s talk a bit about perspective. Take a look at the image below. As you can see some of the objects are visible, and some are hidden depending on the viewer’s point of view. In the first case (side view) only the parts in red are visible. The same applies to the second case (top the view). In the third case is a mix of first and second case, the farther we are away, the more perspective there is. In this case, the sides are highlighted in blue.
Step 2
Download the original sketch (here) to use as base of this illustration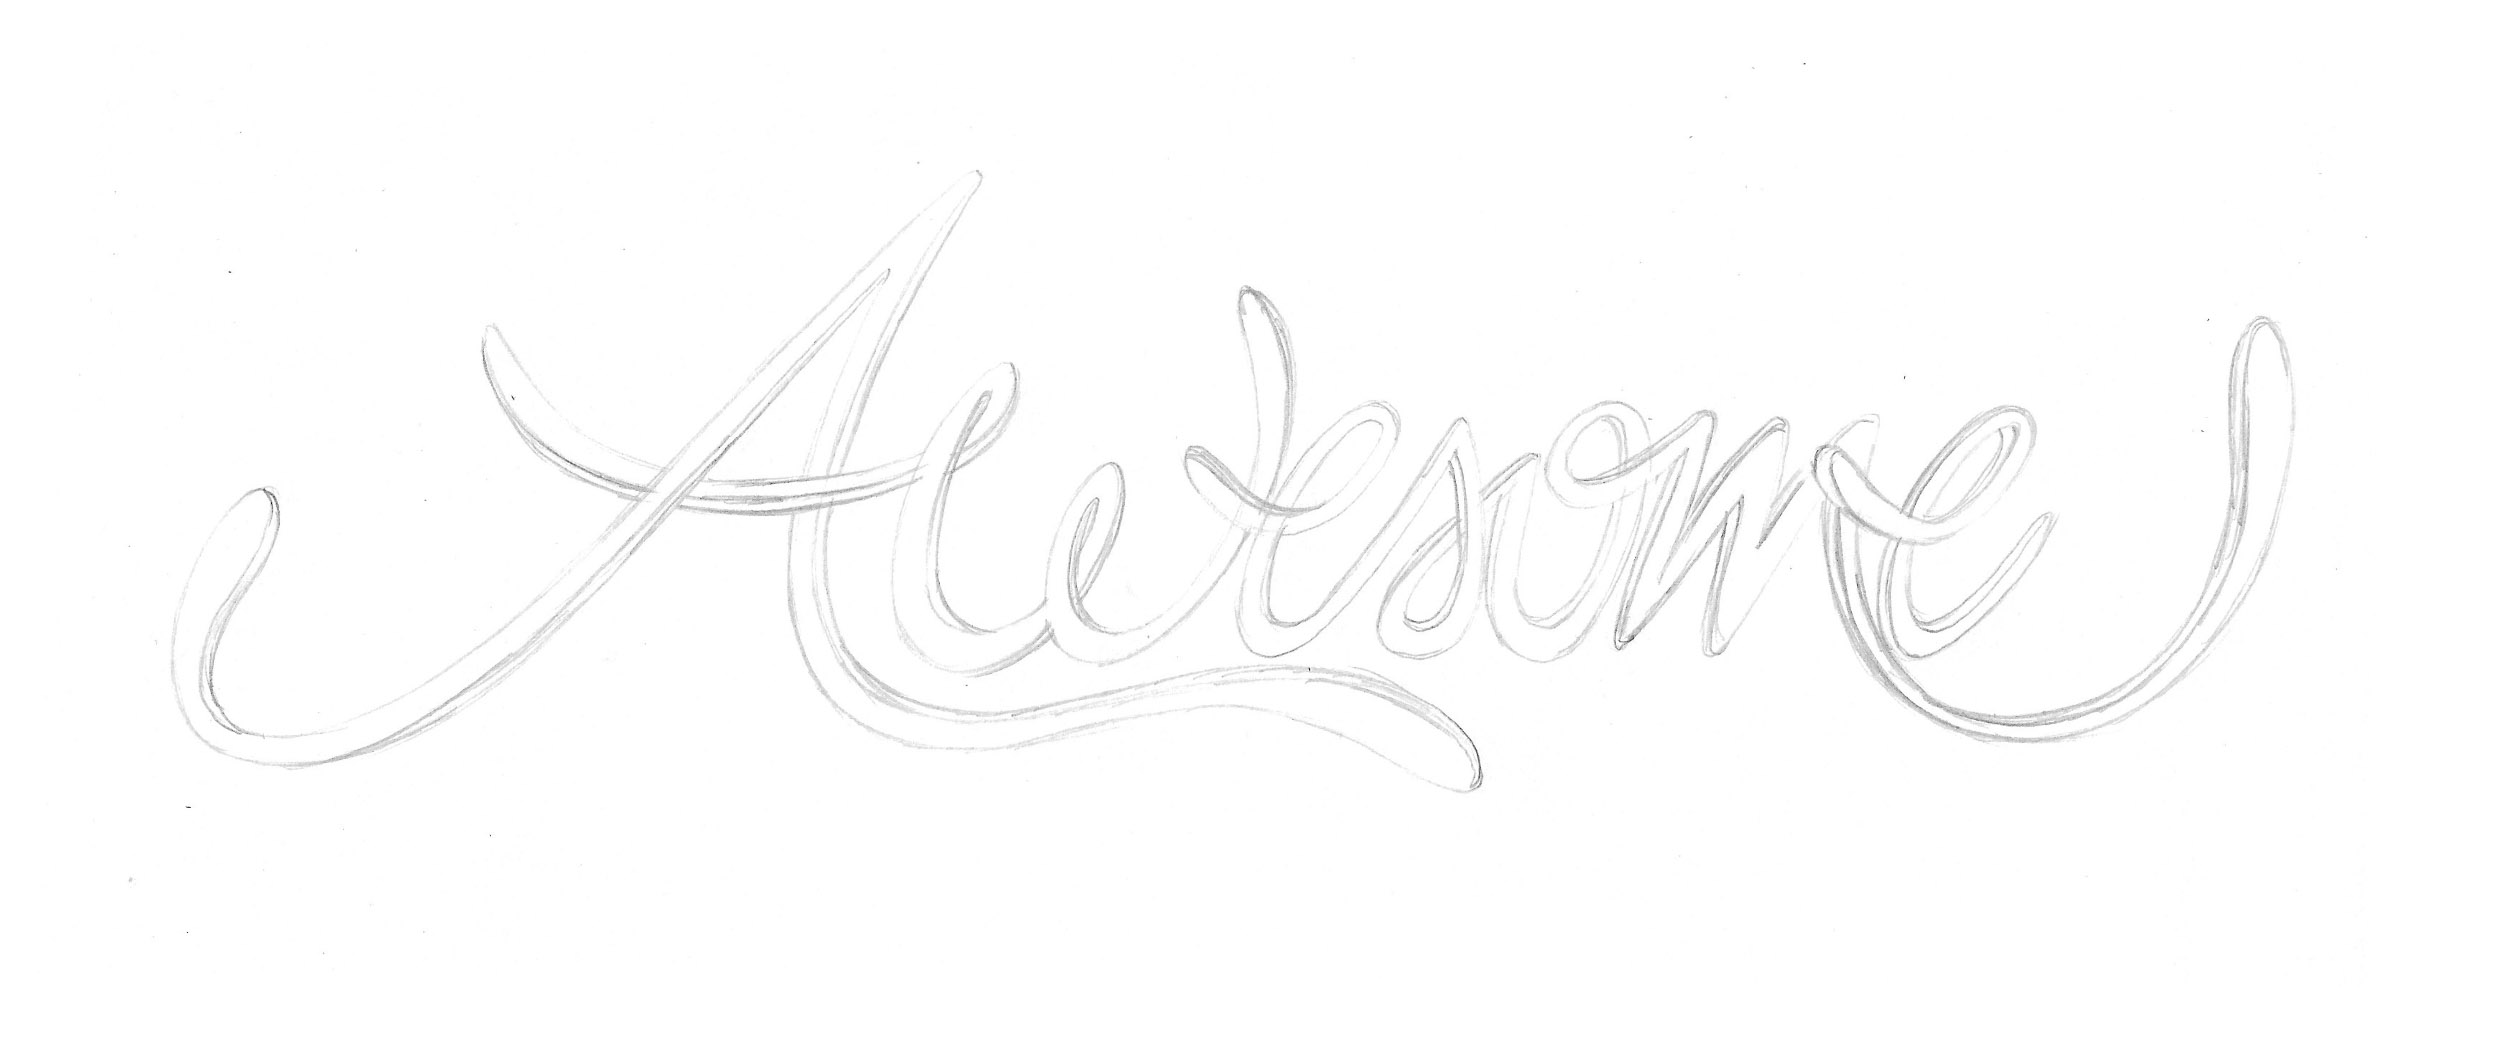
Step 3
In Photoshop, create a new image with 2500×1050 pixels (RGB, 72 dpi).Step 4
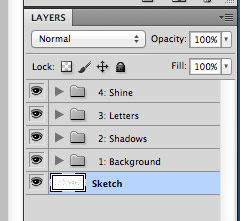
Import the sketch within this file and create four folders, 1: Background, 2: Shadows, 3: Letters, 4: ShineStep 5
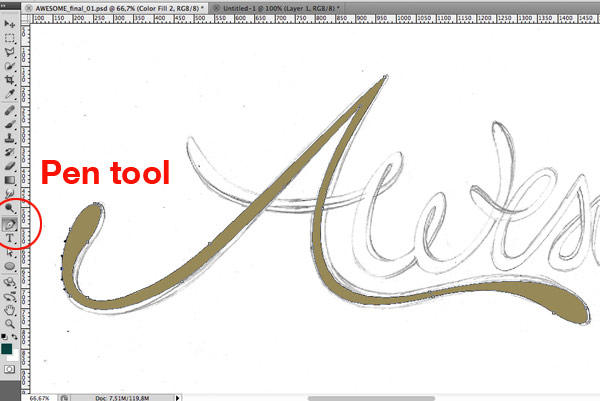
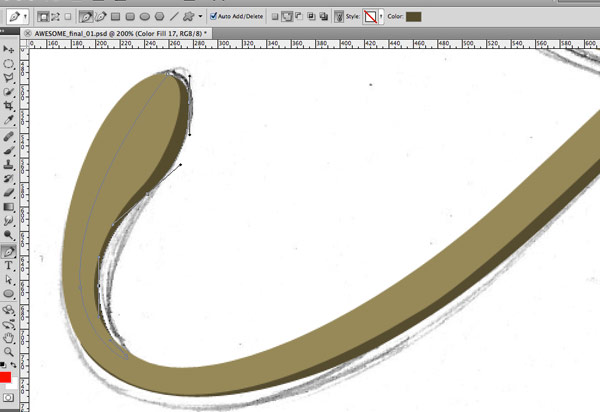
Using the "pen tool", start to draw the letters (inside the folder "3: letters"), following the same path of the sketch. Use #978958 to fill the letters with this color. Do the same on all letters. Each letter should be on a separate layer inside the folder "3" Letters".Step 6
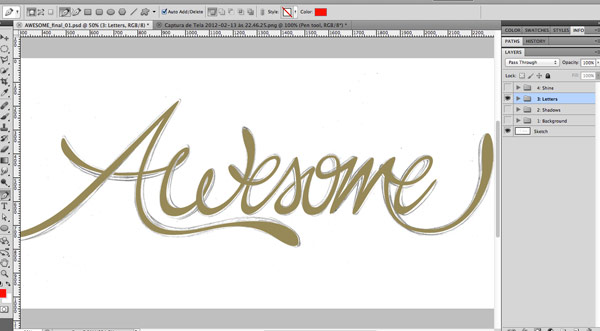
After drawing all the letters, it will look like the image below:Step 7
Now let’s make the paths to create depth. Refer to the first step where I explained the differences in perspective. To give a sense of depth, just follow along the paths from the sketch. Many times we can correct the paths of the sketch when we are drawing in Photoshop by making more rounded curves. Use the color #554c2f.Step 8
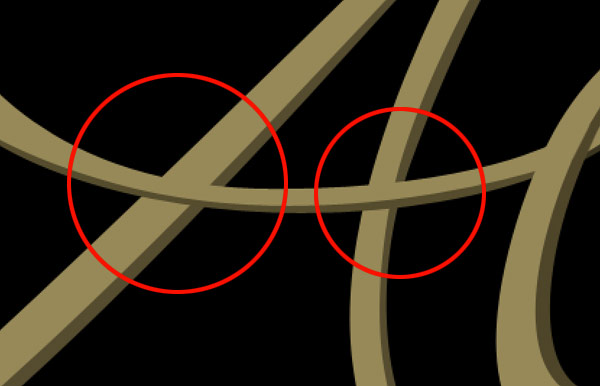
Sometimes you’ll see that the some parts are overlapping on other parts. See at example below, the letter "A" where the two legs are going over.Step 9
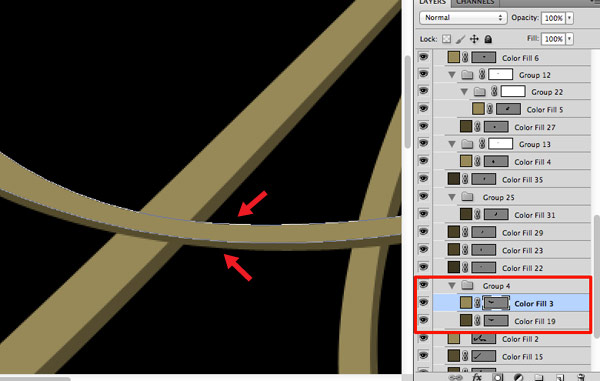
To make one of the lines pass underneath, we do not need to change the position of the layer, instead we need to make a folder called ‘mask’ to hide the piece of the line that overlaps the other object. To do this, group both layers of the object that are overlapping the line (crossbar) of the "A" as seen in the image below.Step 10
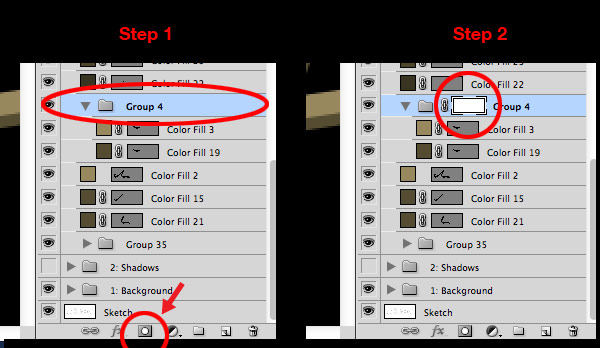
Upon completing Step 9 we will now create a layer mask on this folder. Click on the the ‘group’ layer and then on the bottom panel "layers", now click on the icon that is showed in the step 1 (see below). The result is a white rectangle on the right side of the folder which is called a layer mask (step 2).
Thank you for
visit our blog.
Hope you can learn something new from this tutorial. For your valuable suggestion please put your comment below.
Hope you can learn something new from this tutorial. For your valuable suggestion please put your comment below.
Get brilliant
qualities clipping path, clipping path service &
image masking service from Clipping Design. Clipping Design always assures photo
editing at quick turnaround time with guaranteed client satisfaction on top
quality photoshop masking .
You can also discover 100% handmade clipping path&clipping path service in reasonable price.
You can also discover 100% handmade clipping path&clipping path service in reasonable price.
Thank you…
Reference: tutsplus
No comments:
Post a Comment